
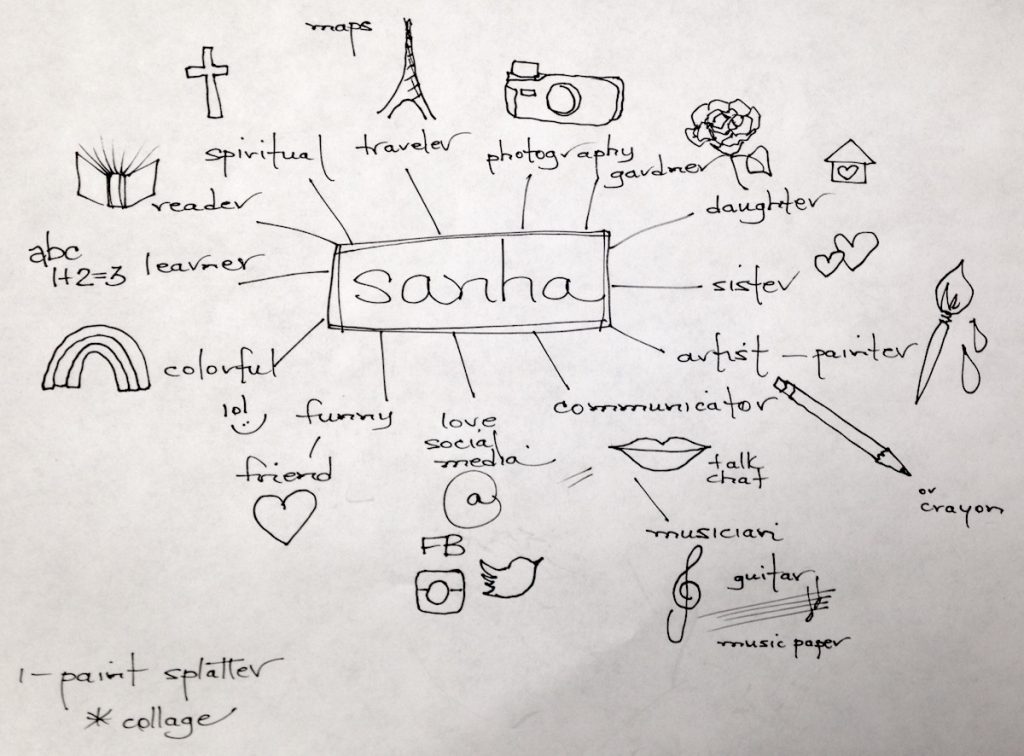
3D ARCHITECTURE monogram
3D letters/ Paper Mache project
Lesson Plan:
Objectives:
In this lesson we are learning to construct a 3D letter sculpture from a 2D monogram drawing.
to create an interesting monogram sculpture that has patterns, or designs that are relevant to myself.
Why we are giving our focus to the project:
This is a fun project that teaches students to create something 3d from 2d and emphasized the importance of technical reading abilities, step by step task completion, and craftsmanship.
Student Success Criteria:
1. Students are successful when they have created a 3D letter that is able to stand on its own, have personal meaning within the work and uses mastery craftsmanship when constructing the letter so that is shaped well with smooth edges, painted and completed with design.
Time to create:
Steps:
Resources
/uploads/2/8/1/6/28165013/your_rubric__creating_a_painting___creating_3d_letters__paper_mache.html
https://sites.google.com/a/edge-cole.k12.ia.us/ed-co-art-department/class-websites/8th-grade-art/3d-block-letter
http://www.slideshare.net/RebeccaDrews/architectural-letter-sculpture
<iframe src="//www.slideshare.net/slideshow/embed_code/key/M6tOVSL
Lesson Plan:
Objectives:
In this lesson we are learning to construct a 3D letter sculpture from a 2D monogram drawing.
to create an interesting monogram sculpture that has patterns, or designs that are relevant to myself.
Why we are giving our focus to the project:
This is a fun project that teaches students to create something 3d from 2d and emphasized the importance of technical reading abilities, step by step task completion, and craftsmanship.
Student Success Criteria:
1. Students are successful when they have created a 3D letter that is able to stand on its own, have personal meaning within the work and uses mastery craftsmanship when constructing the letter so that is shaped well with smooth edges, painted and completed with design.
Time to create:
Steps:
- Choose a letter and font type from your previous sketchbook study for your sculpture.
- Make sure you can draw it into a shape, not just line.
- Draw out your letter on the chip board. Once it is exactly how you want it, cut it out.
- Use this piece as a template to trace your second letter.
- Put your name on both of these pieces.
- Place/glue cups between your two pieces of cardboard....making sure that the two letters line up.
- Place tape over the open area (where you see the cups.
- Paper mache the edges and the whole letter.
- Prime your letter with white gesso.
- Sketch your designs on the front and back of this letter.
- Paint your letter, and wait for it to dry.
- Take a picture and turn it in. Take it home!
Resources
/uploads/2/8/1/6/28165013/your_rubric__creating_a_painting___creating_3d_letters__paper_mache.html
https://sites.google.com/a/edge-cole.k12.ia.us/ed-co-art-department/class-websites/8th-grade-art/3d-block-letter
http://www.slideshare.net/RebeccaDrews/architectural-letter-sculpture
<iframe src="//www.slideshare.net/slideshow/embed_code/key/M6tOVSL
creative thinking with Typography
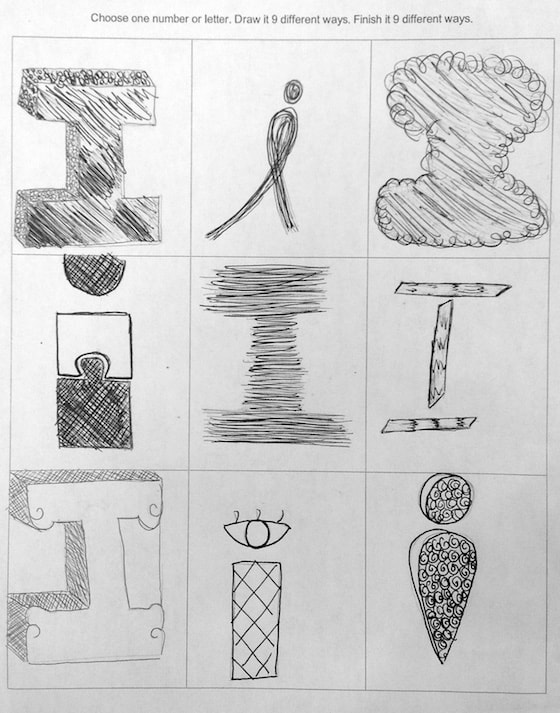
In this lesson we are choosing one letter or number and pushing our creative minds to come up with 9 different ways to design that letter or number.
This is important because not only is it a very fun exercise that challenges our creative minds, but we are also using this sketchbook study to prepare us for our final art lesson of the semester.
Students are successful when they have drawn In their sketchbook or on a blank piece of paper the following: 1) they have used a ruler to divide the page into 3 row and 3 columns so the page is 9 equal squares. 2) They have selected one letter or number and drawn it 9 different ways with different patterns and design for each.
Below is an example. DO NOT COPY ANY OF THESE IDEA'S! The challenge is to complete it by the end of the hour. This is a creative thinking exercise designed to set us up for our next project.
keep calm and learn about graphic design
We have three weeks of school left and we are half way to being 8th graders! We must keep calm and carry on!
In this lesson we are learning the meaning of parody in art, how to create graphic art using pixlr editor and getting an introduction to basic graphic design principles.
This is important because it's a fun and creative way to learn the history of the keep calm poster, to learn how to create layers and create a parody of art.
I know I am successful when I have created a Keep Calm Poster that has three layers, one layer for the background color, a second layer with my type font that complements my idea, and a third layer with my graphic clip art. I have saved my work to my drive and turned it in to google classroom.
Essential question: How doe artist and designers create works of art that effectively communicate? How does knowing the contexts histories and traditions of art forms help us create works of art and design?
Resources for copy right free clip art.
http://clipart-library.com/copyright-free-clipart.html
https://pixabay.com/vectors/search/clip%20art/
https://www.pdclipart.org/
https://www.gettyimages.com/photos/clip-art?sort=best&mediatype=photography&phrase=clip%20art
http://www.clker.com/

Project 2: Realistic food with secret compartment
Introduction to the wheel
Ceramics Unit: PRoject One
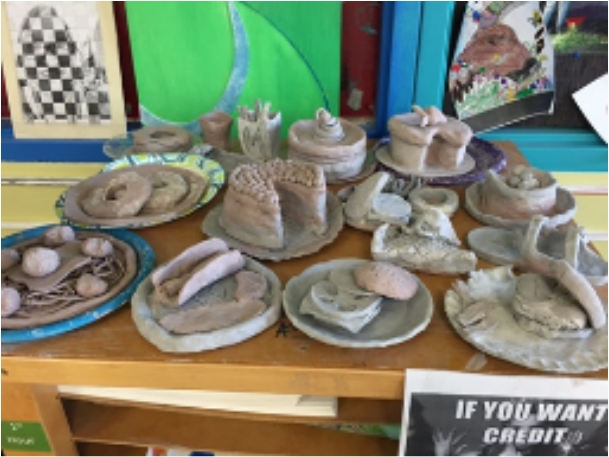
We are learning the processes of clay, and how to hand build a coil pot.
This is important because we are learning the fundamental skills of ceramics while learning the processes of clay.
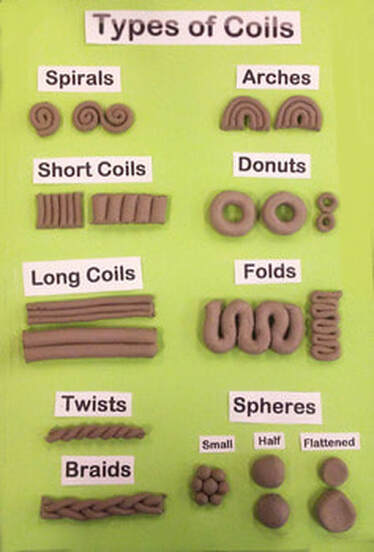
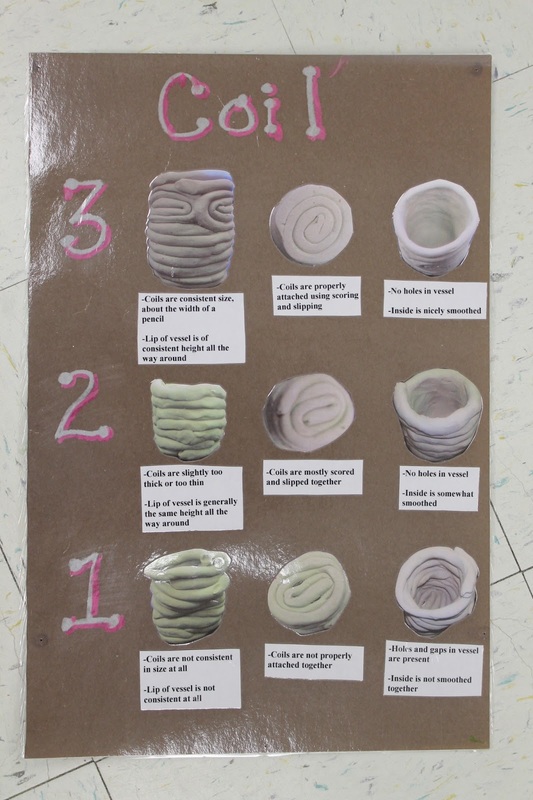
I have researched an idea and drawn out the shape and know my work is successful when I have built a coil pot that has three or more types of coils, my vessel is at least five inches tall and I have applied the techniques of slipping, scoring and have stacked my coils neatly.
This is important because we are learning the fundamental skills of ceramics while learning the processes of clay.
I have researched an idea and drawn out the shape and know my work is successful when I have built a coil pot that has three or more types of coils, my vessel is at least five inches tall and I have applied the techniques of slipping, scoring and have stacked my coils neatly.
Jardine Students, follow the link below to see a step by step instruction on how to build a clay pot. This website is a wealth of information! Enjoy.
http://www.lakesidepottery.com/Pages/Pottery-tips/Making-a-clay-coiled-pot-Lakeside-Pottery-Tutorial.htm
http://www.lakesidepottery.com/Pages/Pottery-tips/Making-a-clay-coiled-pot-Lakeside-Pottery-Tutorial.htm
COIL POTS CHECKLIST
HELPFUL TIP: Put your name on your pot. If someone takes it, I cannot help you if your name isn’t on it.
HELPFUL TIP: Put your name on your pot. If someone takes it, I cannot help you if your name isn’t on it.
- Create 3 sketches of coil pots that use repetition and pattern in your sketchbook. Color these or write down colors you want to use. KEEP THESE SKETCHES.
- Roll out a clay slab, as demoed in class, to build the base for your pot.
- Start to execute and build your coil pot based on the design in your sketchbook.
- Set out to dry and Mrs. Latham will fire it for you. We will have a glaze day later in the semester.
- Take a photo of your pot and upload it to Google Classroom.
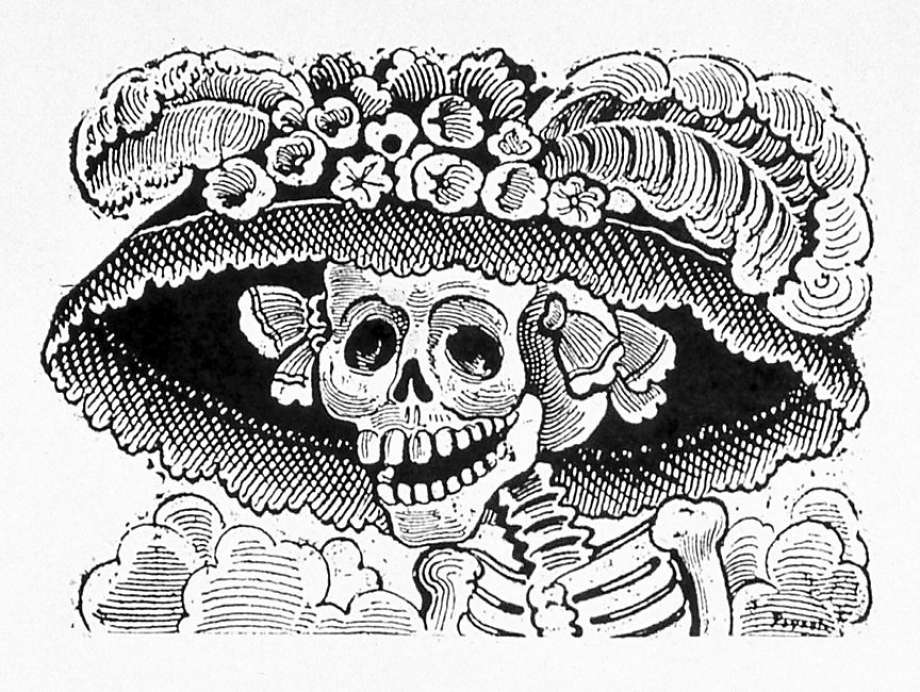
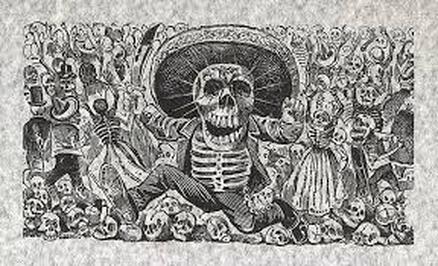
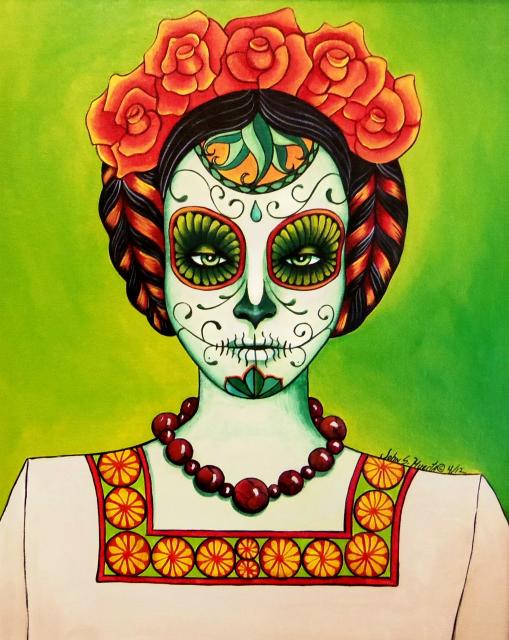
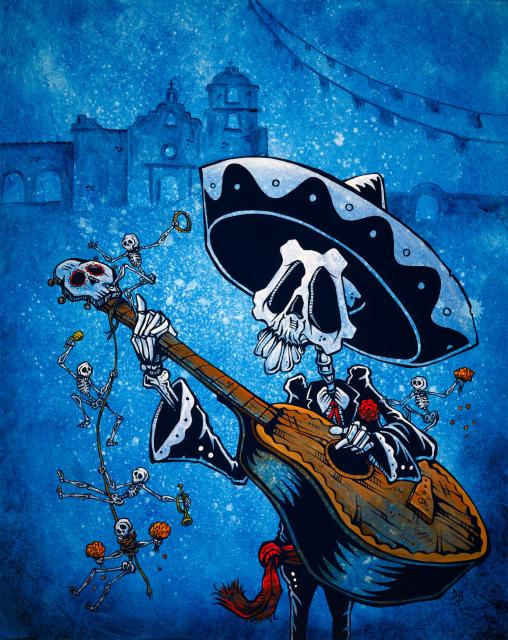
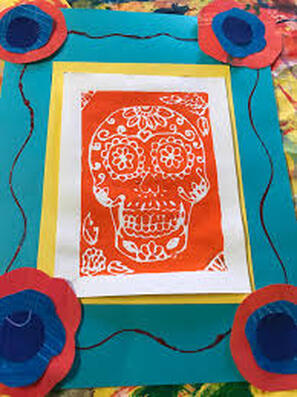
Dea De Los Muertos and Printmaking
Essential Questions:
Learning Objective:
Success Criteria:
Day 1. I am successful when I have completed the think, plan exercise with Mrs. Latham and completed a detailed drawing of my work in my sketchbook. * My idea fills the page and has three or more symbolic objects in it relating to my ancestors,* I have carefully considered the nextative space of my work and the background compete in addition to my subject matter. * My drawing is detailed but is made of lines, shapes, and textures that will transfer into a successful print.
Day 2. I have traced my drawing with a pen and have strong indentions in the foam.
Day 3. I have inked and pulled a successful print of my work and hung them to dry with my name on the back of my paper.
Day 4. I have glued my work to a background paper, signed my work, and have photographed and uploaded my work to google classroom.
National Standards:
Creating
(Cr1.1.7) Apply methods to overcome creative blocks.
(Cr1.2.7) Develop criteria to guide making a work of art or design to meet an identified goal. (Cr2.1.7) Demonstrate persistence in developing skills with various materials, methods, and approaches in creating works of art or design.
(Cr2.3.7) Apply visual organizational strategies to design and produce a work of art, design, or media that clearly communicates information or ideas.
(Cr3.1.7) Reflect on and explain important information about personal artwork in an artist statement or other format.
Connecting
(Cn10.1.7) Individually or collaboratively create visual documentation of places and times in which people gather to make and experience art or design in community.
(Cn11.1.7) Analyze how response to art is influenced by understanding the time and place in which it was created, the available resources, and cultural uses.
Lesson Introduction: Student will be guided through discussion about cultural appropriation, cultural traditions, and then asked to think of a loved one they would like to honor. This lesson is in collaboration with ESL and students are creating work form a poetry.
Collaborative learning activities: Think, pair, share
Instruction & Process:
Time to create:
Vocabulary: Cultural appropriation, tradition, Dea De Los Muertos, symbolism, pattern, symmetry, relief printmaking, brayer, inking, and positive and negative shapes.
Materials needed: sketchbooks, pencils, paper, ink, brayer, inking trays, styrofoam trays, and drying rack
Grading Format: Reflective writing and self assessment project rubric.
Resources: https://frecklefaceteacher.weebly.com/uploads/4/5/1/6/45169543/kreger.indielesson1.pdf
http://missartypants.blogspot.com/2013/10/dia-de-los-muertos.html
https://www.californiamuseum.org/photo-gallery/day-dead-art-dia-de-los-muertos
- How does the Mexican concept of death differ from that of what we are traditionally taught to think about death?
- How does our past connect us to our future?
- What does cultural appropriation mean and what responsibilities do artists have when borrowing from cultural practices outside of our own?
- How does popular culture influence cultural appropriations?
Learning Objective:
- Student can explain the Mexican tradition of Dia De Los Muertos
- Students can identify how cultural appropriation is borrowed in regard to popular culture.
- Students will create artwork honoring a past loved one by way of relief printmaking techniques.
Success Criteria:
Day 1. I am successful when I have completed the think, plan exercise with Mrs. Latham and completed a detailed drawing of my work in my sketchbook. * My idea fills the page and has three or more symbolic objects in it relating to my ancestors,* I have carefully considered the nextative space of my work and the background compete in addition to my subject matter. * My drawing is detailed but is made of lines, shapes, and textures that will transfer into a successful print.
Day 2. I have traced my drawing with a pen and have strong indentions in the foam.
Day 3. I have inked and pulled a successful print of my work and hung them to dry with my name on the back of my paper.
Day 4. I have glued my work to a background paper, signed my work, and have photographed and uploaded my work to google classroom.
National Standards:
Creating
(Cr1.1.7) Apply methods to overcome creative blocks.
(Cr1.2.7) Develop criteria to guide making a work of art or design to meet an identified goal. (Cr2.1.7) Demonstrate persistence in developing skills with various materials, methods, and approaches in creating works of art or design.
(Cr2.3.7) Apply visual organizational strategies to design and produce a work of art, design, or media that clearly communicates information or ideas.
(Cr3.1.7) Reflect on and explain important information about personal artwork in an artist statement or other format.
Connecting
(Cn10.1.7) Individually or collaboratively create visual documentation of places and times in which people gather to make and experience art or design in community.
(Cn11.1.7) Analyze how response to art is influenced by understanding the time and place in which it was created, the available resources, and cultural uses.
Lesson Introduction: Student will be guided through discussion about cultural appropriation, cultural traditions, and then asked to think of a loved one they would like to honor. This lesson is in collaboration with ESL and students are creating work form a poetry.
Collaborative learning activities: Think, pair, share
Instruction & Process:
Time to create:
- Draw out your idea on a full page for your muerto in your sketchbook.
- Show Mrs.Latham your work and get a piece of foam from her.
- Place your foam sheet underneath of your drawing and trace over every line pressing firmly with an ink pen.
- Get printing paper and go to printing stations. You will pull one print.
- Ink the styrofoam with the color you want and then flip it and lay it down on top of your paper.
- Roll the brayer over the back of the foam pressing firmly. Don’t let the foam slide!
- Slowly peel the foam away from the paper and look at your print. Hang your print to dry.
- While your work is drying complete reflection questions attached to the lesson in google classroom. This is part of your final grade.
- When your work is dry, glue it to a bigger piece of paper. Choose a contrasting color. Glue your work down to the paper to create a frame. Decorate your frame if you wish. The more colorful, and rich with pattern, the better.
- Take a picture, turn it in to google classroom. Give your work to Mrs. Latham to hang.
Vocabulary: Cultural appropriation, tradition, Dea De Los Muertos, symbolism, pattern, symmetry, relief printmaking, brayer, inking, and positive and negative shapes.
Materials needed: sketchbooks, pencils, paper, ink, brayer, inking trays, styrofoam trays, and drying rack
Grading Format: Reflective writing and self assessment project rubric.
Resources: https://frecklefaceteacher.weebly.com/uploads/4/5/1/6/45169543/kreger.indielesson1.pdf
http://missartypants.blogspot.com/2013/10/dia-de-los-muertos.html
https://www.californiamuseum.org/photo-gallery/day-dead-art-dia-de-los-muertos
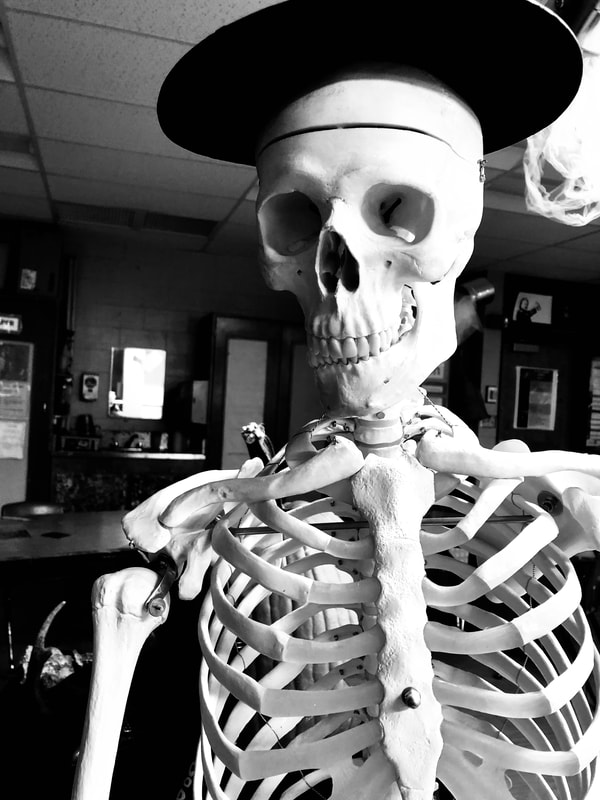
Adding Value to our Still life Drawings
Contour line drawing
viewLesson Introduction: 5 minute stations where students move and draw simple contour line drawing at each table.
Vocabulary: contour line, line weight, proportion, overlapping, space, shape, composition, balance, still life.
Instruction & Process:
1. Use the viewfinder find a composition that has three or more images unless you are drawing the skeleton.
2. Draw very lightly to find the vertical and horizontal lines that are to measure your height and width of you objects.
3. Once you have established your spatial relationships, begin drawing the outline shapes of your objects.
4. Draw the details last.
5. Put your name in the bottom corner of the final drawing, photography and turn in to google classroom. Do not take this home, you will be drawing from this for your next project.
Materials needed: Pencils, paper, drawing boards, viewfinder
Grading Format: Rubric based on the following....
Success criteria:
- My drawing fills the page,. 10 points
- has three or more overlapping objects. 10 points
- my objects are proportionate to one another. 10 points
- I have contour lines for my outline shape and my details. 10 points
- My work is signed with my name and hour.
- I have photographed it and turned it in to google classroom.
Building a digital Portfolio
What is a portfolio? A collection of your artwork
Why do we have to have one? To showcase our growth and interests as an artists. To share our work and to create a digital presence. To learn the 21st century skill of building a website.
Objectives:
- I can create a website.
- I can write an artist statement that reflects where I am as an artist.
- I can upload photos to my site in order to show my personal growth both short and long term.
- I can understand and demonstrate digital citizenship.
Steps to creating your site.
- Go to google sites.
- Click on the new google sites on the bottom right column.
- Click on the plus sign in bottom corner.
- Name your site Your First & Last Name
- Your Homepage should say… Your name and Art Portfolio
- On the right you see three tabs. Inserts, pages, themes. The insert page helps you build each page. The pages tab creates separate pages and the themes controls your font styles and size.
- Your portfolio needs to have a Home page, a page titled My Artwork, and a page titled Artist Statement. You will be expected to write a detailed artist statement. In your sketchbook you have an artist statement worksheet. Follow the prompts and you will great.
tto see my portfolio example.
Student Checklist
- The Homepage is an introduction of yourself. It must include at least one picture of yourself or of you and your family and friends. Use this page to share some of your personal interests. Think of it as an “about me” page. Tell us something about yourself? Consider including your favorite quote
- My Artwork: On this page you will upload pictures of your work. You will give your work a title, and then medium that you created it with. Example: Title: The Thinking Chair, Medium: Digital Photography
- Artist Statement: Write a detailed artist statement. Please be mindful of your grammar, and punctuation. Follow the artist statement flowchart in your sketchbook. Here is an electronic copy of that document.
file:///C:/Users/clatham/Downloads/Artist-Statement-Flow-Chart-final1.pdf
Once you are finished, publish it using your first and last name and then submit the link to google classroom under the portfolio assignment. Set the view for Topeka 501 so you may share it with future art teachers.
Discussion points:
- Their invisible audience – many students choose to set their digital portfolios to be limited to users on our school’s Google Apps domain. However, that means that everyone in our community who has an account can access student work. Eportfolios can be viewed by students, teachers, administrators, parents, and anyone with access to a username/password. This should influence students to write informatively without oversharing, and place emphasis on grammar and spelling.
- Appropriate commenting – write a comment that is specific and/or can initiate a discussion. Something like, “I liked your use of color” or “I see you painted a guitar. Do you play any other instruments?” Constructive criticism such as “ I am curious as to why you chose this specific color green, It doesn’t work for me because it doesn’t go well with the rest of your color scheme.”
- Digital citizenship and having a sound understanding of creative commons, permission, and giving credit to others for their work.
- Inserting an image by linking to the URL of the image online rather than taking a screen snapshot or dragging a copy of the image to the desktop. By using the URL, students can simply point to something else online. The alternative is to copy/take/steal a version of it which is tantamount to theft (depending on how the work is licensed).
"Digital citizenship" is an umbrella term that covers a whole host of important issues. Broadly, it's the guidelines for responsible, appropriate behavior when one is using technology. But specifically, it can cover anything from "netiquette" to cyberbullying; technology access and the digital divide; online safety and privacy; copyright, plagiarism, and digital law, and more. " for more resources check out this page.
REFERENCES:
www.educatorstechnology.com/2013/10/5-excellent-videos-to-teach-your.html
Nine Elements - Digital Citizenship
Videos
How to create an electronic portfolio.
https://youtu.be/nqbibjtgIZ8
Great Student Examples here!!!
sites.google.com/topekapublicschools.net/adisyn-caryl/artist-statement
sites.google.com/topekapublicschools.net/cjohnston/home
https://sites.google.com/topekapublicschools.net/jacobcassell2021/home
https://sites.google.com/topekapublicschools.net/kaydeevotaw/home
https://sites.google.com/topekapublicschools.net/kamm/home
https://sites.google.com/topekapublicschools.net/meganhuffman/home
Digital PLAGIARISM
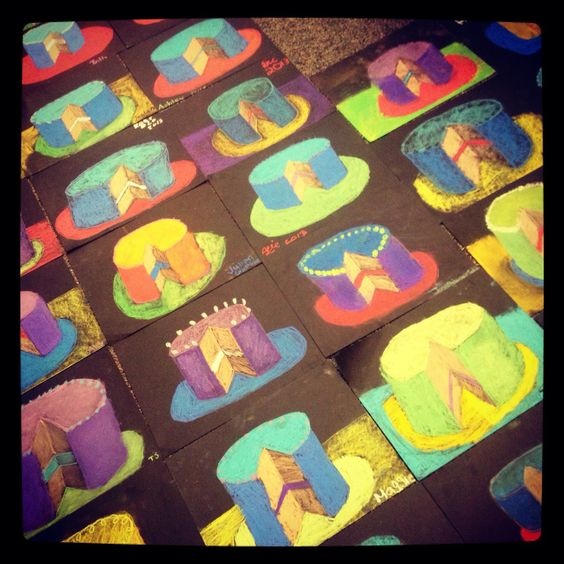
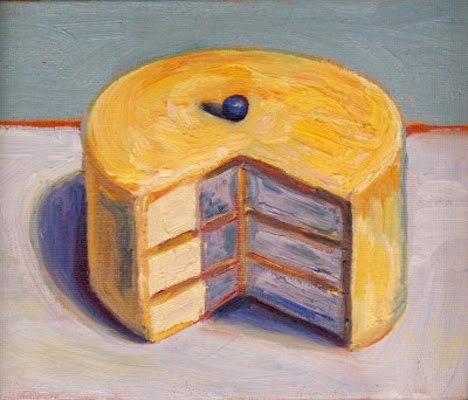
Wayne Thiebaud Cakes/ value and contrast
Lesson Introduction: slide show and video
Lesson Objective: I can demonstrate how to use chalk pastel to create value. I can explain who Wayne Theibaud is. I can explain what pop art is. I will practice all eight studio habits of mind through the creating of this project.
Getting Started: Before we dive in to our final drawing, lets practice drawing our cakes on the dry eraser boards with marker. Once you feel you have the correct angles down, lets practice working with chalk pastels. Here you will find the proper steps to using the media of chalk pastel.
Time to Create:
National Standards:
Creating
(Cr1.1.7) Apply methods to overcome creative blocks.
(Cr1.2.7) Develop criteria to guide making a work of art or design to meet an identified goal. (Cr2.1.7) Demonstrate persistence in developing skills with various materials, methods, and approaches in creating works of art or design.
(Cr2.3.7) Apply visual organizational strategies to design and produce a work of art, design, or media that clearly communicates information or ideas.
(Cr3.1.7) Reflect on and explain important information about personal artwork in an artist statement or other format.
Presenting
(Pr5.1.7) Based on criteria, analyze and evaluate methods for preparing and presenting art.
Responding
(Re8.1.7) Interpret art by analyzing art-making approaches, the characteristics of form and structure, relevant contextual information, subject matter, and use of media to identify ideas and mood conveyed.
Connecting
(Cn11.1.7) Analyze how response to art is influenced by understanding the time and place in which it was created, the available resources, and cultural uses.
Vocabulary: Ellipsis, value, blending, acute and obtuse angels, chalk pastel, pop art.
Kagan activities: Time Share Pare:
Instruction & Process: Direct demonstration & written instructions on the table.
Materials needed: Black paper cut 12 x 12, pencil, eraser, chalk pastel, aqua net hair spray.
Resources: www.boredart.com/2015/08/chalk-pastel-techniques-learn-how-to-use-it.html
http://nhartgallery.blogspot.ca/2012/12/middle-school-art-tint-and-shade.html
Assessment:
Lesson Objective: I can demonstrate how to use chalk pastel to create value. I can explain who Wayne Theibaud is. I can explain what pop art is. I will practice all eight studio habits of mind through the creating of this project.
Getting Started: Before we dive in to our final drawing, lets practice drawing our cakes on the dry eraser boards with marker. Once you feel you have the correct angles down, lets practice working with chalk pastels. Here you will find the proper steps to using the media of chalk pastel.
Time to Create:
- On black paper Plan your drawing. ...draw it lightly!
- Choose your pastels. ...
- Gather stumps to use for blending and a kneaded rubber eraser to remove pigment. ...
- Work from dark to light. ...
- Clear the pastel dust from your work frequently. ...
- Keep your hands clean. ...
- Clean off each pastel stick after you use it.
- Spray your work with fixative to protect your work.
National Standards:
Creating
(Cr1.1.7) Apply methods to overcome creative blocks.
(Cr1.2.7) Develop criteria to guide making a work of art or design to meet an identified goal. (Cr2.1.7) Demonstrate persistence in developing skills with various materials, methods, and approaches in creating works of art or design.
(Cr2.3.7) Apply visual organizational strategies to design and produce a work of art, design, or media that clearly communicates information or ideas.
(Cr3.1.7) Reflect on and explain important information about personal artwork in an artist statement or other format.
Presenting
(Pr5.1.7) Based on criteria, analyze and evaluate methods for preparing and presenting art.
Responding
(Re8.1.7) Interpret art by analyzing art-making approaches, the characteristics of form and structure, relevant contextual information, subject matter, and use of media to identify ideas and mood conveyed.
Connecting
(Cn11.1.7) Analyze how response to art is influenced by understanding the time and place in which it was created, the available resources, and cultural uses.
Vocabulary: Ellipsis, value, blending, acute and obtuse angels, chalk pastel, pop art.
Kagan activities: Time Share Pare:
Instruction & Process: Direct demonstration & written instructions on the table.
Materials needed: Black paper cut 12 x 12, pencil, eraser, chalk pastel, aqua net hair spray.
Resources: www.boredart.com/2015/08/chalk-pastel-techniques-learn-how-to-use-it.html
http://nhartgallery.blogspot.ca/2012/12/middle-school-art-tint-and-shade.html
Assessment:
Wayne thiebaud from woolridgep
Introduction to street artist
prezi.com/oyshs0vxafst/banksy/
prezi.com/a6-bazytgsgy/shepard-fairy/
prezi.com/svhl2stmxotc/lady-pink/
prezi.com/a6-bazytgsgy/shepard-fairy/
prezi.com/svhl2stmxotc/lady-pink/
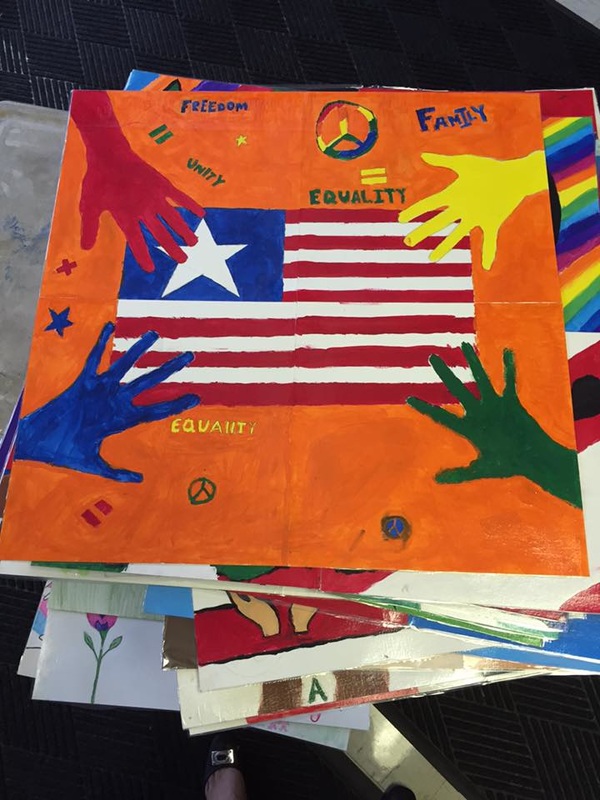
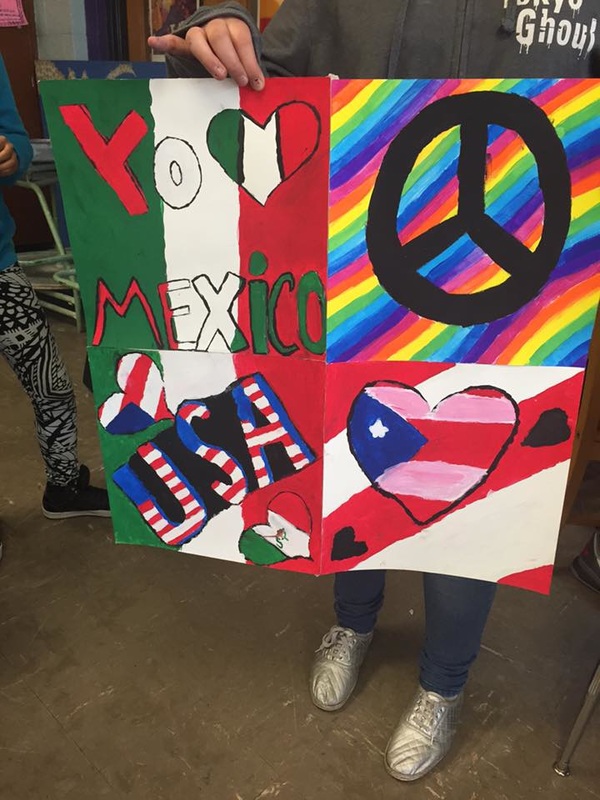
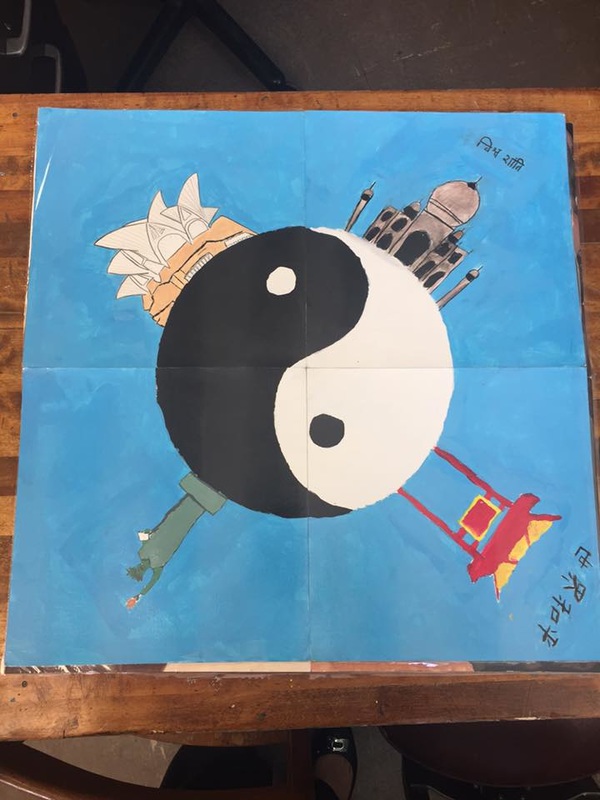
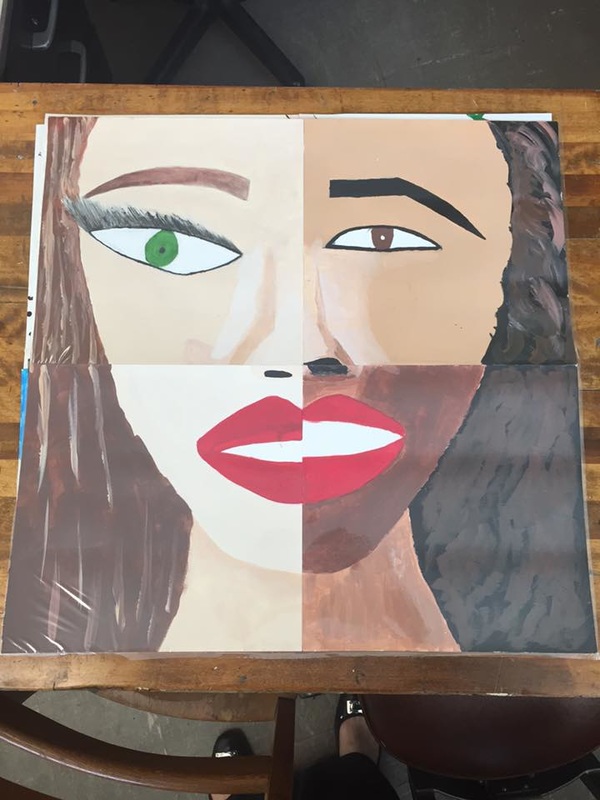
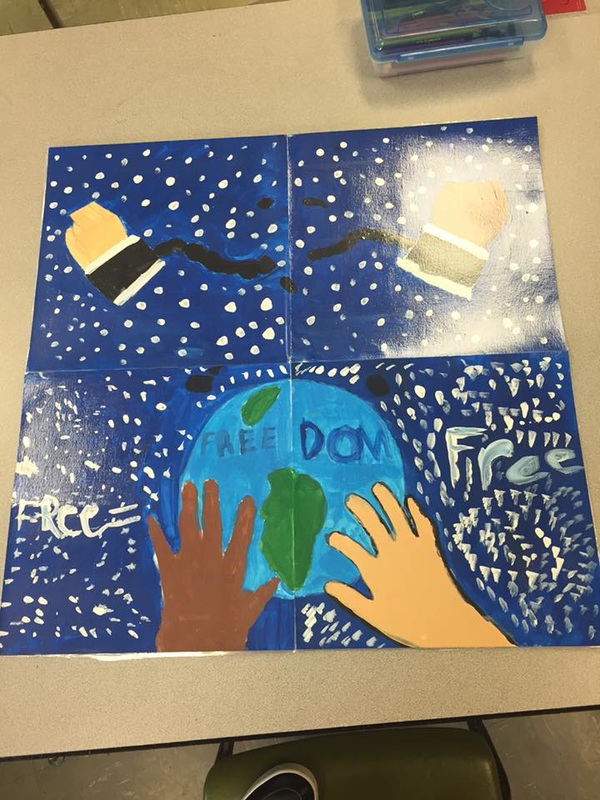
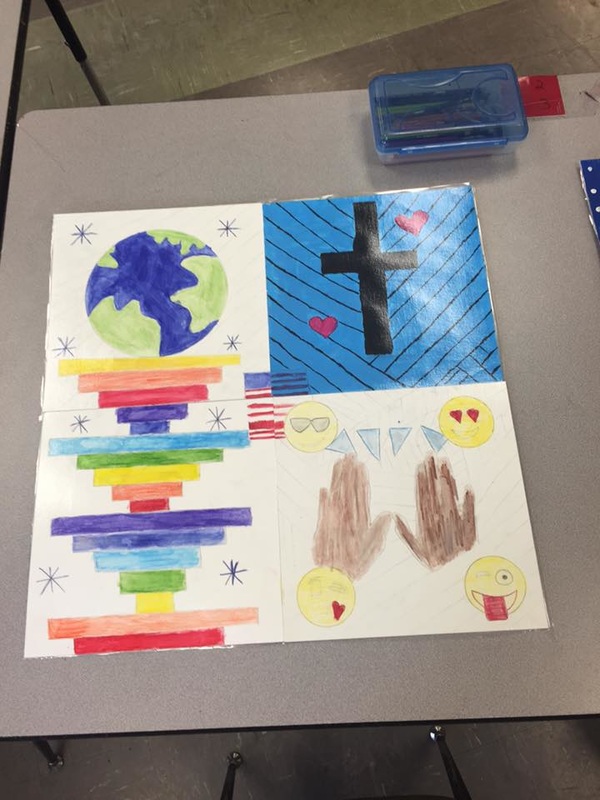
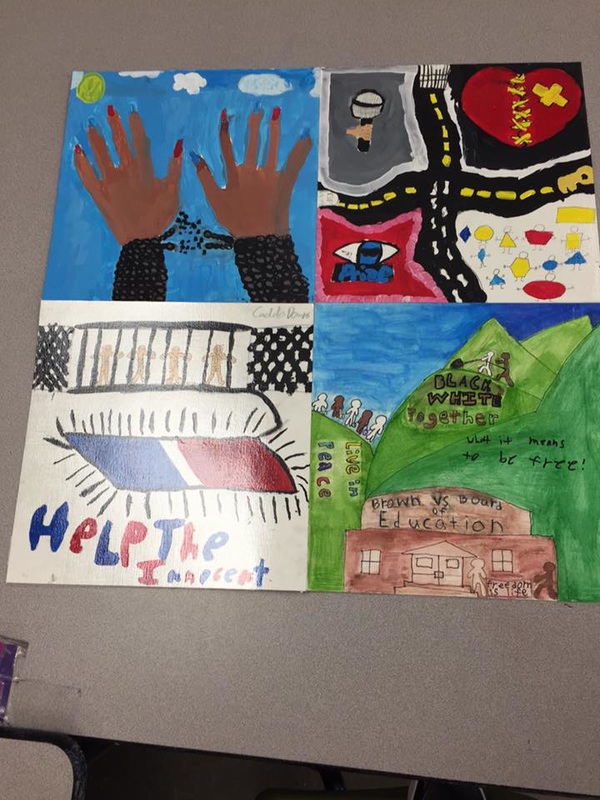
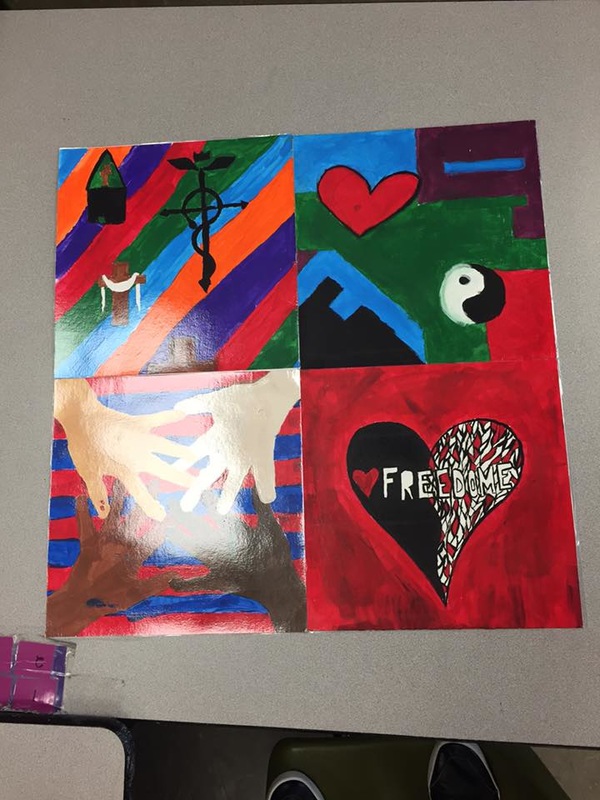
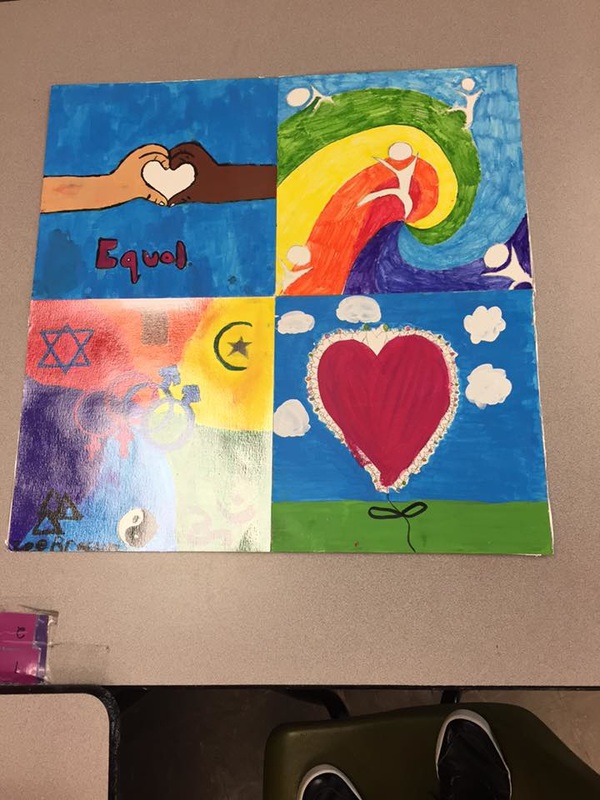
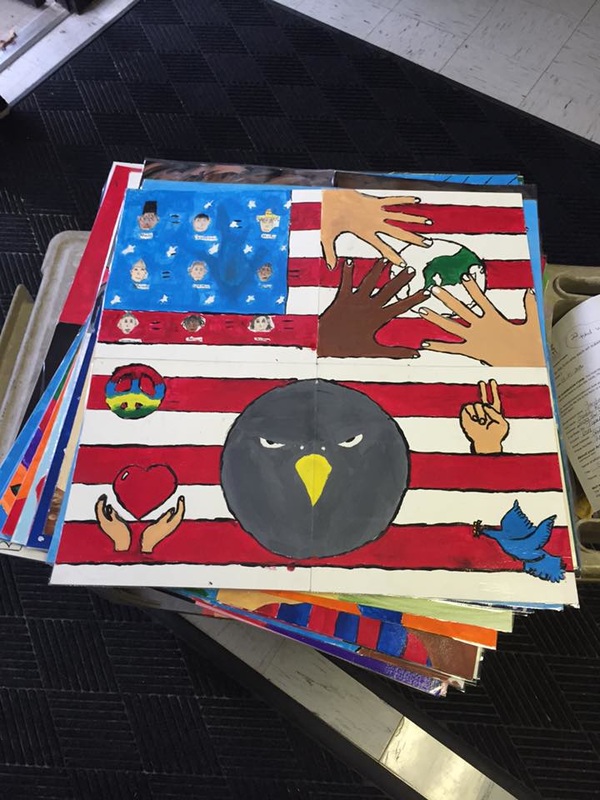
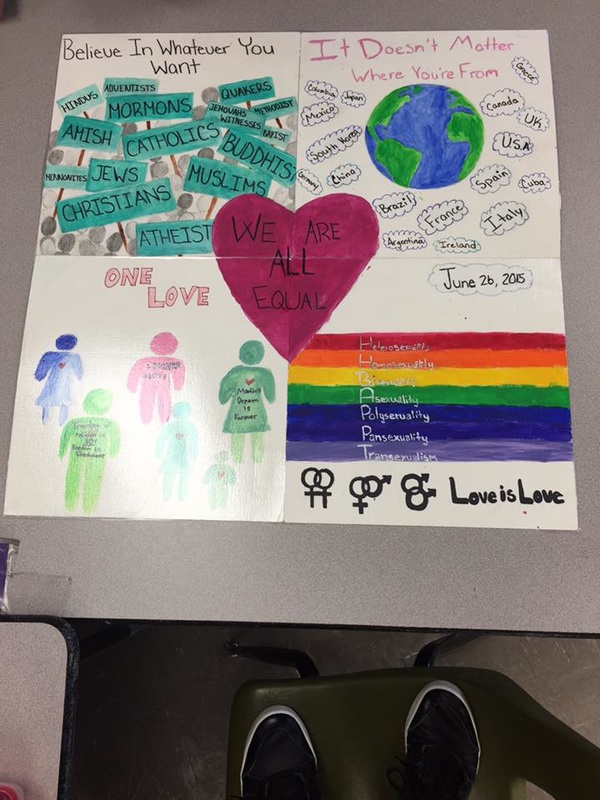
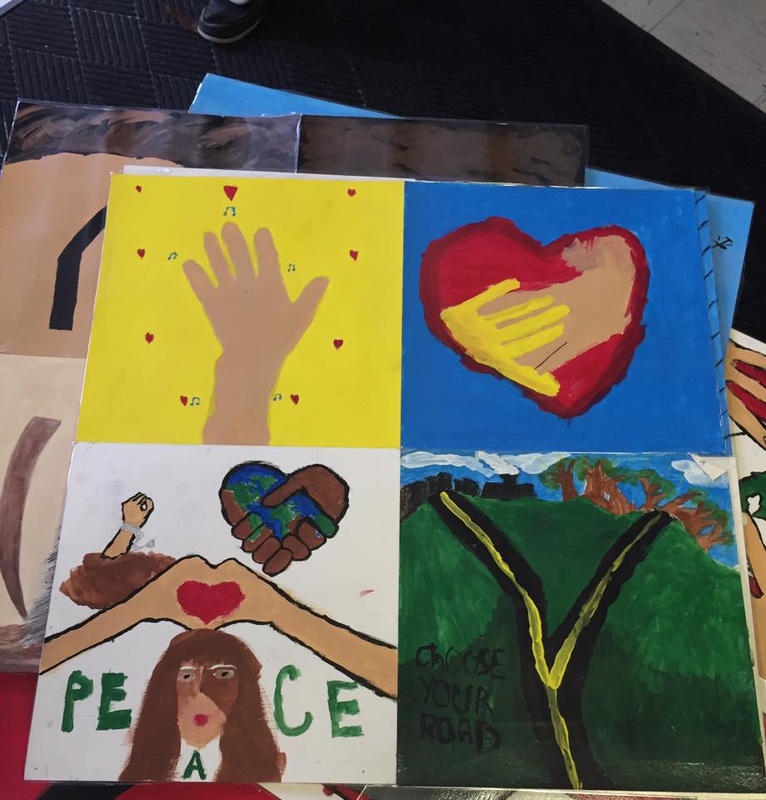
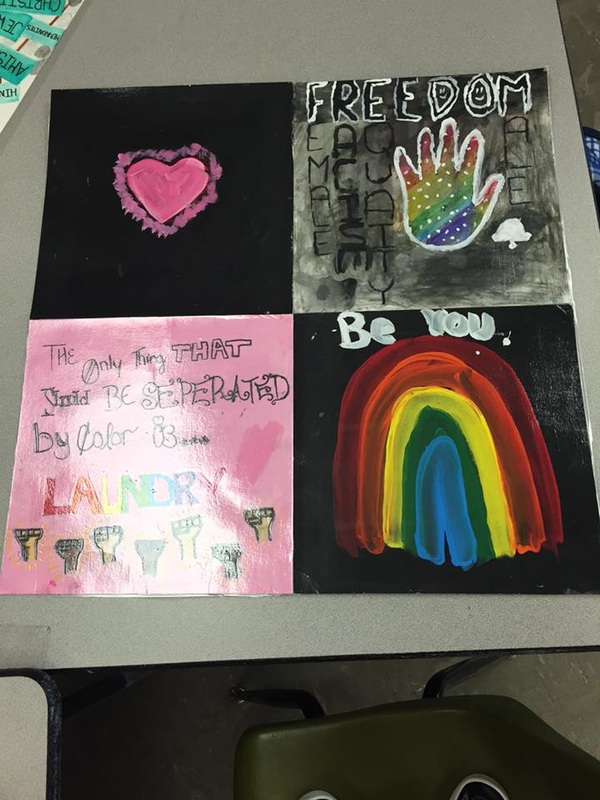
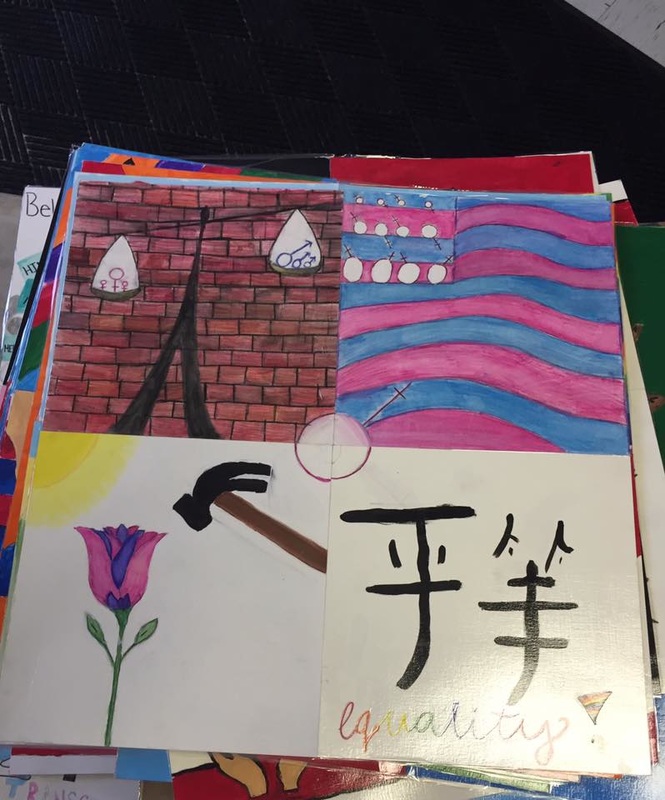
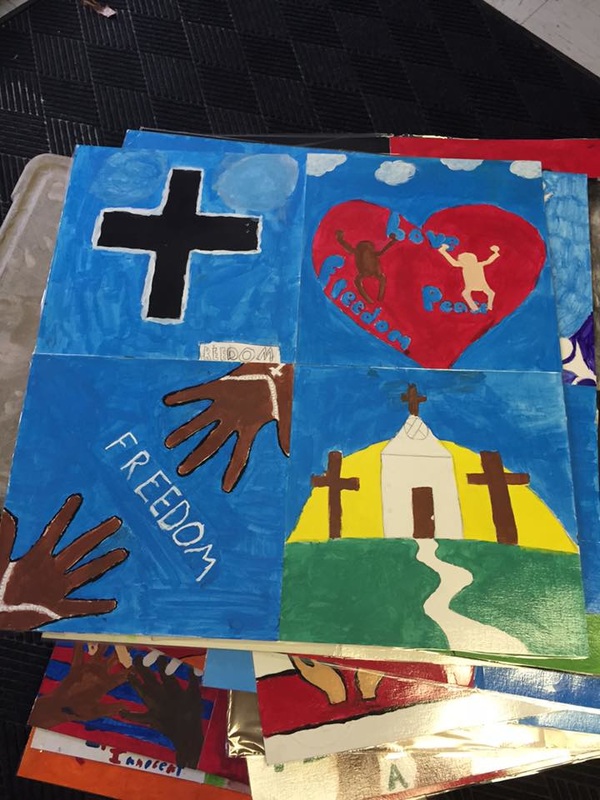
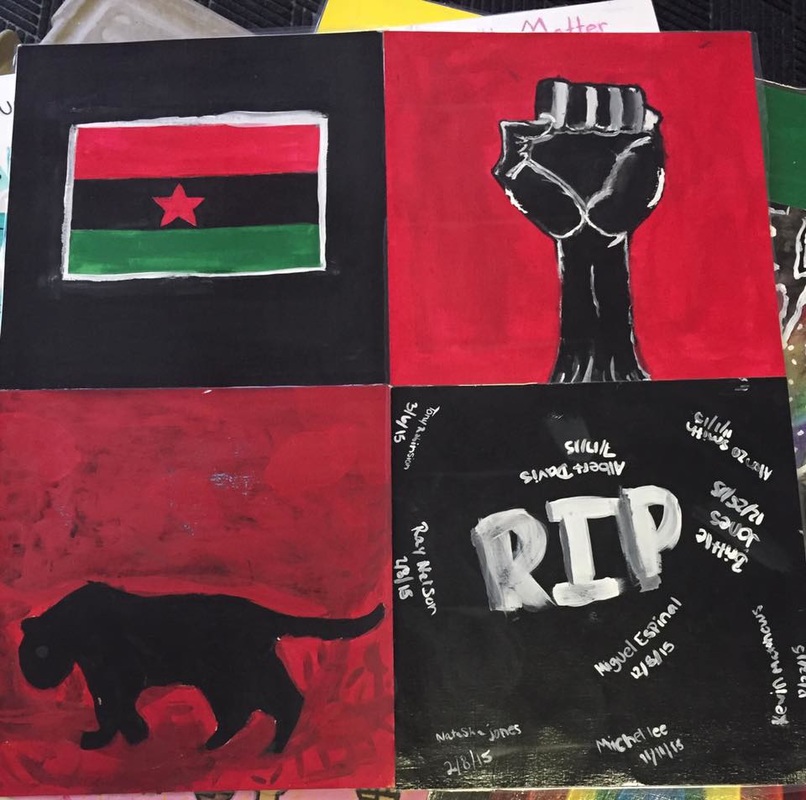
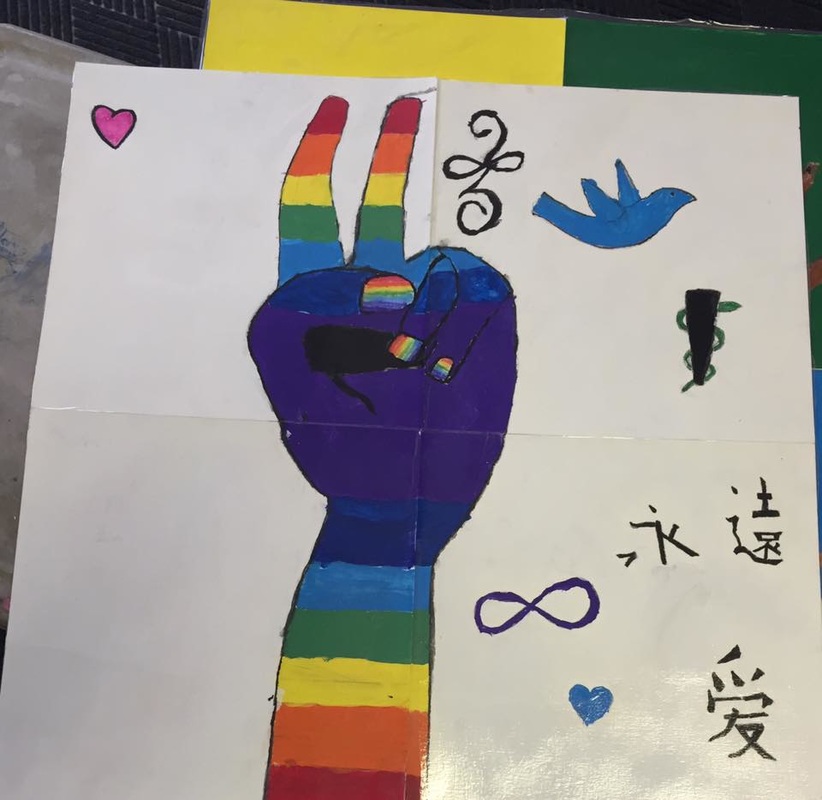
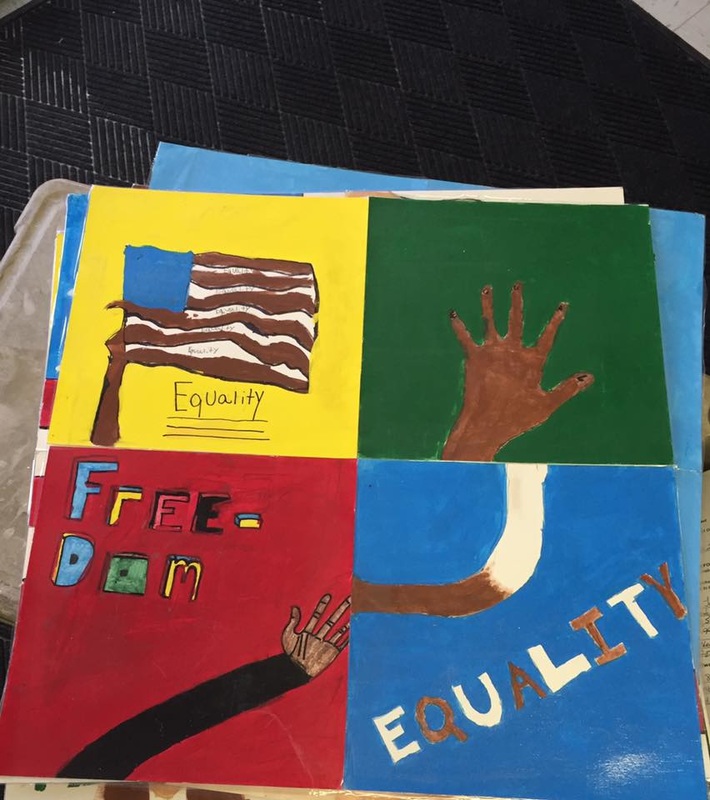
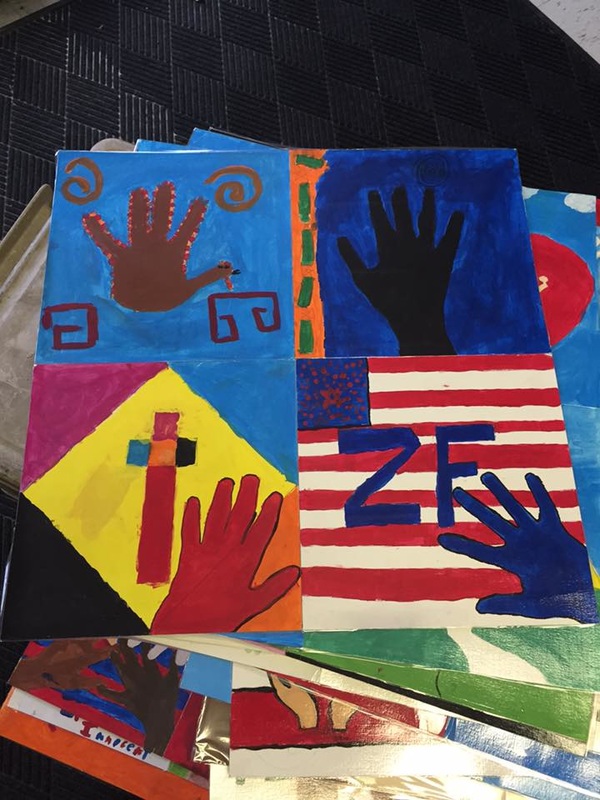
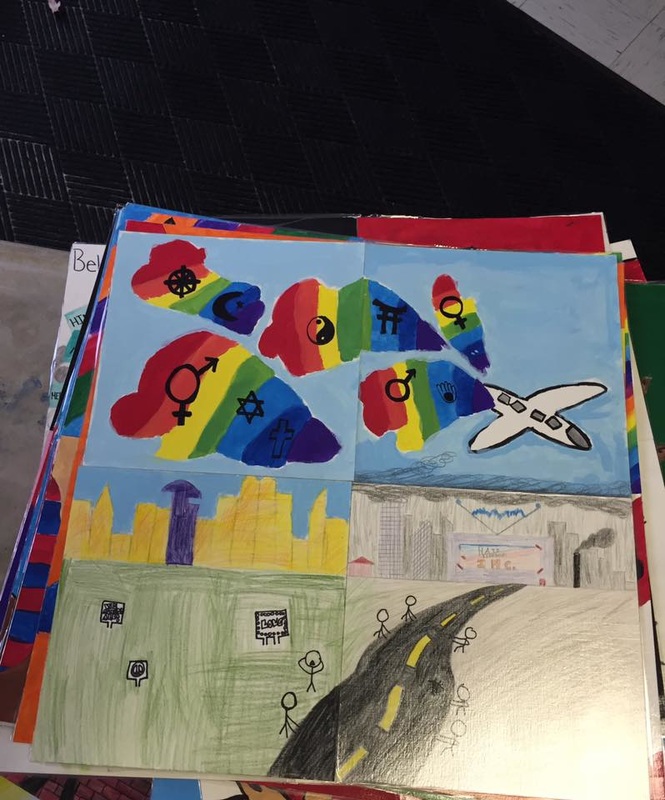
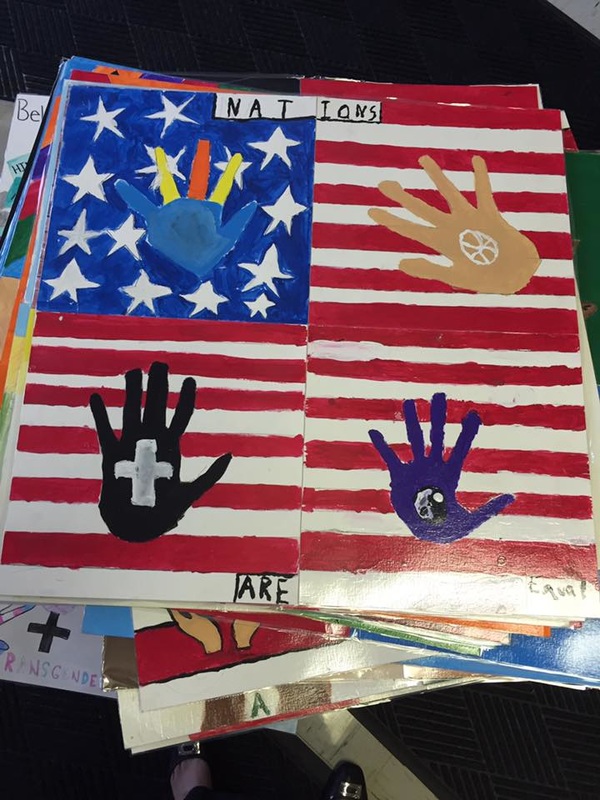
Art is my voice
Artist As Messenger.
"Our Lives Begin to End the Day We Become Silent About Things That Matter."
Standards/ Essential Questions:
Essential Question: What is a symbol? Where and how do we encounter symbolism in
art? How do people contribute to awareness and understanding of their lives and the lives of their communities through art-making? How do artists and designers learn from trial and error? How do artists and designers determine whether a particular direction in their work is effective?
I can create a work of artwork that has a clear message, conveying and feeling.
I can create artwork that reflects work from Banksy, Shepard Fairy, and Lady pink.
Success criteria: I am successful when I have designed a satirical, social, or political poster that: has no more than five symbols and words, Uses four or more colors in design (Choose colors that convey the tone you are trying to convey)
is made of three or more art materials, an area that is reflective of Shepard Fairy’s use of positive and negative space. ( only 20% of the background can be left white), uses at least one stencil ( reference to Banks,) I have signed my work, photographed my work, and turned it into google classroom.
National Standards:
Creating:
(Cr1.1.7) Apply methods to overcome creative blocks.
(Cr1.2.7) Develop criteria to guide making a work of art or design to meet an identified goal.
(Cr2.1.7) Demonstrate persistence in developing skills with various materials, methods, and approaches in creating works of art or design.
(Cr2.2.7) Demonstrate an awareness of ethical responsibility to oneself and others when posting and sharing images and other materials through the internet, social media, and other communication formats.
(Cr2.3.7) Apply visual organizational strategies to design and produce a work of art, design, or media that clearly communicates information or ideas.
(Cr3.1.7) Reflect on and explain important information about personal artwork in an artist statement or other format.
Presenting
((Pr5.1.7) Based on criteria, analyze and evaluate methods for preparing and presenting art.
(Pr6.1.7) Compare and contrast viewing and experiencing collections and exhibitions in different venues.
Responding
(Re7.1.7) Explain how the method of display, the location, and the experience of an artwork influences how it is perceived and valued.
(Re7.2.7) Analyze multiple ways that images influence specific audiences.
(Re8.1.7) Interpret art by analyzing art-making approaches, the characteristics of form and structure, relevant contextual information, subject matter, and use of media to identify ideas and mood conveyed.
Connecting
(Cn10.1.7) Individually or collaboratively create visual documentation of places and times in which people gather to make and experience art or design in community. (Cn11.1.7) Analyze how response to art is influenced by understanding the time and place in which it was created, the available resources, and cultural uses.
Lesson Introduction: Day One: Discuss quote, watch the video and let them pick a topic for their symbolism.
Learning Objective:
I can create artwork that conveys my personal feelings that confronts things that matter to me and affect our society.
I can use art as my voice for personal expression or social, political or cultural activism.
I can identify social movements for which I am naturally inclined to be an activist for.
I can collaborate for understanding on how art can be a powerful tool in being social activist.
I can plan a visual image in response to a current social issue, or in response to my feelings on a historic social issues.
I can use the ideas of street artists like Shepard Fairy, Banksy to provoke emotion, draw awareness, and create street art that conveys my personal call for change.
Vocabulary: Social activism through art. Symbolism, Street art, Stencil, Shepard Fairy, Banksy, positive and negative space, proportion, repetition, mixed media. Lady Pink,
Collaborative activities: discussion: I take responsibility for standing up to exclusion, prejudice and injustice in my community by way of? If I could change one thing in this world, it would be?
Instruction & Process: Guided practice, small group discussion, demonstration, daily goals.
Materials needed: rulers, protractors, compasses, paint, heavy paper 12x18, 12 x 18 tag board, xacto knives, paint palettes, brushes, table instructions, glue , triangles, magazines, Chromebook, clip art
Grading Format: Rubric
Resources: https://www.amnestyusa.org/activism-guide/ https://bigideas.berkeley.edu/art/
https://prezi.com/hz4r-jvgxz8g/street-art-in-the-world/
https://artclasswithlmj.wordpress.com/2013/01/26/activism-through-stencils/
https://www.meca.edu/wp-content/uploads/2015/11/StreetArt.pdf
Connect and Respond
Students will reflect on how art is used to provoke emotion, draw awareness, and is harnessed as a voice for change. Artists are showing work in the community at an upcoming art show.
https://newsela.com/read/lib-grassroots-activism/id/37405
Contests and Community Showing
Arron Douglas Art Fair
Topeka DMK Contest in Topeka Ks
Option One: pick a topic from the following
Topics:
Option Two: bring your own ideas and we will discuss them as a possibility.
Time To Create
Resources
www.meca.edu/wp-content/uploads/2015/11/StreetArt.pdf
artclasswithlmj.wordpress.com/2013/01/26/activism-through-stencils/
Artist As Messenger.
"Our Lives Begin to End the Day We Become Silent About Things That Matter."
Standards/ Essential Questions:
Essential Question: What is a symbol? Where and how do we encounter symbolism in
art? How do people contribute to awareness and understanding of their lives and the lives of their communities through art-making? How do artists and designers learn from trial and error? How do artists and designers determine whether a particular direction in their work is effective?
I can create a work of artwork that has a clear message, conveying and feeling.
I can create artwork that reflects work from Banksy, Shepard Fairy, and Lady pink.
Success criteria: I am successful when I have designed a satirical, social, or political poster that: has no more than five symbols and words, Uses four or more colors in design (Choose colors that convey the tone you are trying to convey)
is made of three or more art materials, an area that is reflective of Shepard Fairy’s use of positive and negative space. ( only 20% of the background can be left white), uses at least one stencil ( reference to Banks,) I have signed my work, photographed my work, and turned it into google classroom.
National Standards:
Creating:
(Cr1.1.7) Apply methods to overcome creative blocks.
(Cr1.2.7) Develop criteria to guide making a work of art or design to meet an identified goal.
(Cr2.1.7) Demonstrate persistence in developing skills with various materials, methods, and approaches in creating works of art or design.
(Cr2.2.7) Demonstrate an awareness of ethical responsibility to oneself and others when posting and sharing images and other materials through the internet, social media, and other communication formats.
(Cr2.3.7) Apply visual organizational strategies to design and produce a work of art, design, or media that clearly communicates information or ideas.
(Cr3.1.7) Reflect on and explain important information about personal artwork in an artist statement or other format.
Presenting
((Pr5.1.7) Based on criteria, analyze and evaluate methods for preparing and presenting art.
(Pr6.1.7) Compare and contrast viewing and experiencing collections and exhibitions in different venues.
Responding
(Re7.1.7) Explain how the method of display, the location, and the experience of an artwork influences how it is perceived and valued.
(Re7.2.7) Analyze multiple ways that images influence specific audiences.
(Re8.1.7) Interpret art by analyzing art-making approaches, the characteristics of form and structure, relevant contextual information, subject matter, and use of media to identify ideas and mood conveyed.
Connecting
(Cn10.1.7) Individually or collaboratively create visual documentation of places and times in which people gather to make and experience art or design in community. (Cn11.1.7) Analyze how response to art is influenced by understanding the time and place in which it was created, the available resources, and cultural uses.
Lesson Introduction: Day One: Discuss quote, watch the video and let them pick a topic for their symbolism.
Learning Objective:
I can create artwork that conveys my personal feelings that confronts things that matter to me and affect our society.
I can use art as my voice for personal expression or social, political or cultural activism.
I can identify social movements for which I am naturally inclined to be an activist for.
I can collaborate for understanding on how art can be a powerful tool in being social activist.
I can plan a visual image in response to a current social issue, or in response to my feelings on a historic social issues.
I can use the ideas of street artists like Shepard Fairy, Banksy to provoke emotion, draw awareness, and create street art that conveys my personal call for change.
Vocabulary: Social activism through art. Symbolism, Street art, Stencil, Shepard Fairy, Banksy, positive and negative space, proportion, repetition, mixed media. Lady Pink,
Collaborative activities: discussion: I take responsibility for standing up to exclusion, prejudice and injustice in my community by way of? If I could change one thing in this world, it would be?
Instruction & Process: Guided practice, small group discussion, demonstration, daily goals.
Materials needed: rulers, protractors, compasses, paint, heavy paper 12x18, 12 x 18 tag board, xacto knives, paint palettes, brushes, table instructions, glue , triangles, magazines, Chromebook, clip art
Grading Format: Rubric
Resources: https://www.amnestyusa.org/activism-guide/ https://bigideas.berkeley.edu/art/
https://prezi.com/hz4r-jvgxz8g/street-art-in-the-world/
https://artclasswithlmj.wordpress.com/2013/01/26/activism-through-stencils/
https://www.meca.edu/wp-content/uploads/2015/11/StreetArt.pdf
Connect and Respond
Students will reflect on how art is used to provoke emotion, draw awareness, and is harnessed as a voice for change. Artists are showing work in the community at an upcoming art show.
https://newsela.com/read/lib-grassroots-activism/id/37405
Contests and Community Showing
Arron Douglas Art Fair
Topeka DMK Contest in Topeka Ks
Option One: pick a topic from the following
Topics:
- Bullying/ Cyber Bullying
- Unlawful Police Killings
- Gun Violen
- Violence Against Women
- Immigration and Refugees
- Child and Women Trafficking
- Discrimination against race, gender, sexual orientation.
- Income inequality
- Depression, mental health, and support
Option Two: bring your own ideas and we will discuss them as a possibility.
Time To Create
- Decide on a topic for your project.
- Find clip art that has copyright free use and draw from them for you ideas in sketchbook. These clip art drawings will help you with your stencil.
- You need to come with one very well developed full page idea in you sketchbook. It must have have all details drawn out. It must be fully designed in color. This is part of your grade. 10 points.
- Once you have got approval from Mrs. Latham you will begin drawing your image for stencil on card stock. Draw it big. Think shapes, not lines, you will cut the shapes out with an xacto knife to make your stencil.
- Draw out your entire project lightly with pencil. When complete, you may move on to paint, markers, oil pastels, color pencil, gel pin.
- Find text from magazine that supports your ideas. No more than five words. Remember, font matters. You can also hand draw your words.
- When it is finished and meets the success criteria, take a picture. I want to show this work at the Aaron Douglas Art Fair and submit some work for the I Have a Dream Contest in January. Student work will be selected by Mrs.Latham. If your work is chosen, you will be asked to attend the Aaron Douglas Art Fair to showcase your work. This art fair is Sept. 28th in the park behind the old Dillon's on 12th and lane. All students who attend the fair can get 10 points extra credit. All projects are due Sept 26th and must be show ready for the 28th.
Resources
www.meca.edu/wp-content/uploads/2015/11/StreetArt.pdf
artclasswithlmj.wordpress.com/2013/01/26/activism-through-stencils/


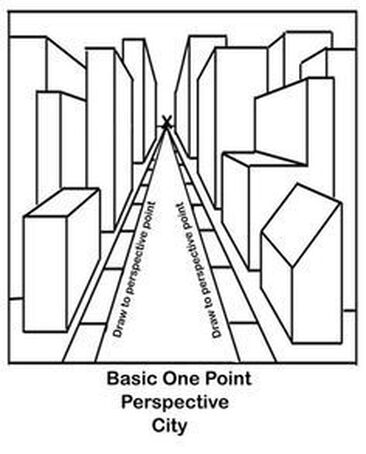
ONE POINT PERSPECTIVE SKETCHBOOK #2
Lesson Plan
Objective:
I can create a cityscape using one point perspective.
I can use a ruler to make straight lines of my city scape. .
Materials
Pencil
Color pencil, pens, sharpies
Paper
Ruler
Vocabulary
Vanishing Point
Horizon Line
Linear Perspective
Form
ReSources
https://www.artwithmrsnguyen.com/2013/05/one-point-perspective-city-streets-5th.html?m=1
Time to Create
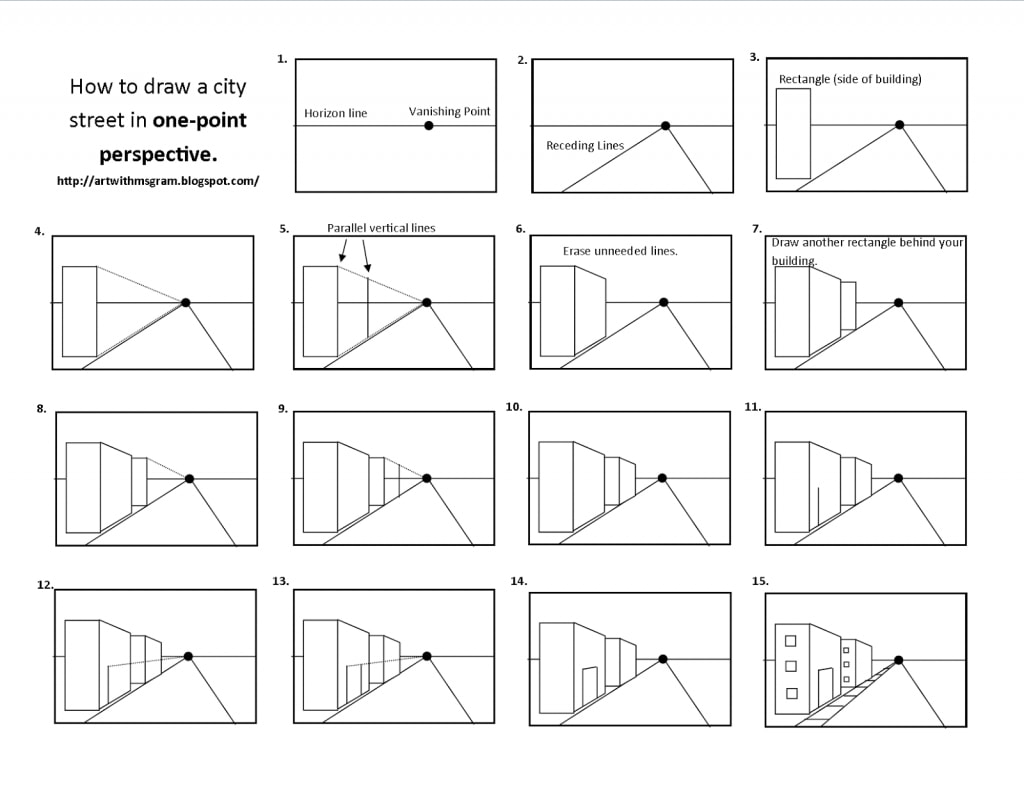
Follow the step by step diagram above.
You are to draw a city scapes using one point perspective.
Hora de crear
Siga el diagrama paso a paso anterior.
Debes dibujar una ciudad con una perspectiva de un punto.
Objective:
I can create a cityscape using one point perspective.
I can use a ruler to make straight lines of my city scape. .
Materials
Pencil
Color pencil, pens, sharpies
Paper
Ruler
Vocabulary
Vanishing Point
Horizon Line
Linear Perspective
Form
ReSources
https://www.artwithmrsnguyen.com/2013/05/one-point-perspective-city-streets-5th.html?m=1
Time to Create
Follow the step by step diagram above.
You are to draw a city scapes using one point perspective.
- You must have 7 or more buildings
- 6 windows
- 5 business signs or symbols
- 4 buildings that overlap
- 3 objects in the sky
- A horizon line and one vanishing point.
Hora de crear
Siga el diagrama paso a paso anterior.
Debes dibujar una ciudad con una perspectiva de un punto.
- Debe tener 7 o más edificios
- 6 ventanas
- 5 signos o símbolos comerciales
- 4 edificios que se superponen
- 3 objetos en el cielo
- Una línea de horizonte y un punto de fuga.
LEsson Two: GRAFFITI and ONe POInt PERSPECTIVE
LESSON PLAN OBJECTIVE:
I CAN CREATE SPACE AND MAKE 3D LETTERS ON A 2D PLANE USING ONE POINT PERSPECTIVE.
I CAN APPLY ONE POINT PERSPECTIVE TO GRAFFITI.
I CAN EXPLORE A VARIETY OF FONTS AND TEXT TO CREATE WORK THAT LOOKS LIKE GRAFFITI.
MATERIALS PENCIL COLOR PENCIL, PENS, SHARPIES, PAPER, COLORED PAPER, GLUE STICKS
VOCABULARY: One point perspective, graffiti, font and text, vantage point, horizon line, space, 3d, 2d, contrast, unity, proportion.
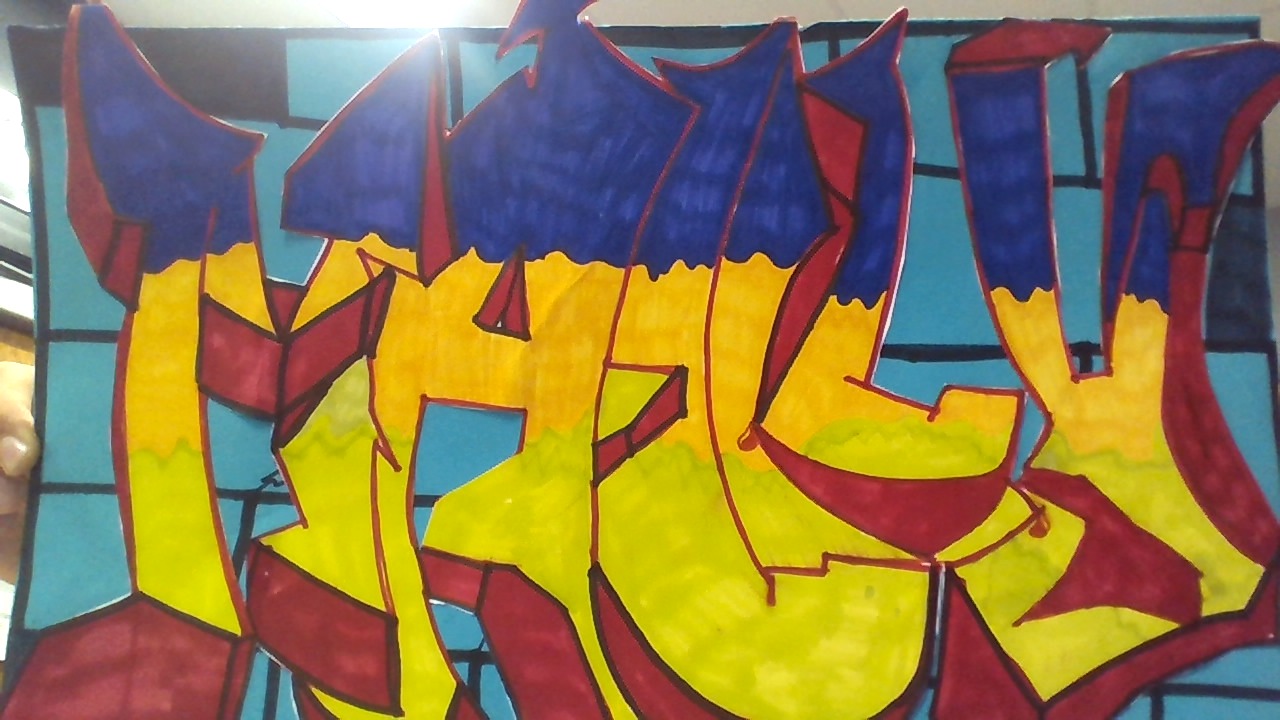
SUCCESS CRITERIA: I am successful in my graffiti project when I have created my name using at least 5 inch graffiti letters, four characters or symbols, three thumbnail sketches, at least three colors that is completed with my best craftsmanship. My work is photographed and uploaded to google classroom.
Resources
http://www.studentartguide.com/articles/one-point-perspective-drawing
One point perspective.jpg
http://prezi.com/llf1qa3n4p77/?utm_campaign=share&utm_medium=copy&rc=ex0share
Collaborative activities: Discuss contrasting colors on the color wheel with shoulder partner.
Instruction & Process: Follow the art of ed resource and watch video.
Grading Format: https://docs.google.com/document/d/1Z7CltWi8aDuRHLEbD4LwOY8f2ry5emWHTPaY0o6nuDM/edit
Resources:
https://www.theartofed.com/2017/08/18/implement-graffiti-inspired-unit-week-one/
https://prezi.com/r2nkjiwvcsxx/graffiti-names/?webgl=0
https://prezi.com/rnh4-tuhktcp/1-point-perspective-in-art/?utm_campaign=share&utm_medium=copy
http://www.graffitidiplomacy.com/FreeGraffitiDrawingLessons.html
http://arteascuola.com/2015/10/name-in-graffiti-style/
https://prezi.com/ctb1mp4tmfv8/graffiti-art/?webgl=0#
I CAN CREATE SPACE AND MAKE 3D LETTERS ON A 2D PLANE USING ONE POINT PERSPECTIVE.
I CAN APPLY ONE POINT PERSPECTIVE TO GRAFFITI.
I CAN EXPLORE A VARIETY OF FONTS AND TEXT TO CREATE WORK THAT LOOKS LIKE GRAFFITI.
MATERIALS PENCIL COLOR PENCIL, PENS, SHARPIES, PAPER, COLORED PAPER, GLUE STICKS
VOCABULARY: One point perspective, graffiti, font and text, vantage point, horizon line, space, 3d, 2d, contrast, unity, proportion.
SUCCESS CRITERIA: I am successful in my graffiti project when I have created my name using at least 5 inch graffiti letters, four characters or symbols, three thumbnail sketches, at least three colors that is completed with my best craftsmanship. My work is photographed and uploaded to google classroom.
Resources
http://www.studentartguide.com/articles/one-point-perspective-drawing
One point perspective.jpg
http://prezi.com/llf1qa3n4p77/?utm_campaign=share&utm_medium=copy&rc=ex0share
Collaborative activities: Discuss contrasting colors on the color wheel with shoulder partner.
Instruction & Process: Follow the art of ed resource and watch video.
Grading Format: https://docs.google.com/document/d/1Z7CltWi8aDuRHLEbD4LwOY8f2ry5emWHTPaY0o6nuDM/edit
Resources:
https://www.theartofed.com/2017/08/18/implement-graffiti-inspired-unit-week-one/
https://prezi.com/r2nkjiwvcsxx/graffiti-names/?webgl=0
https://prezi.com/rnh4-tuhktcp/1-point-perspective-in-art/?utm_campaign=share&utm_medium=copy
http://www.graffitidiplomacy.com/FreeGraffitiDrawingLessons.html
http://arteascuola.com/2015/10/name-in-graffiti-style/
https://prezi.com/ctb1mp4tmfv8/graffiti-art/?webgl=0#
TIME TO CREATE
- Practice throws and tags on whiteboard.
- You have two class periods to research and make three thumbnails sketches for ideas.
- Plan out your color schemes, you need at least 3 colors and and one point perspective. ..Make sure it looks "3d" This is a rough sketch so it needs enough information that I know you are ready!
- Show Mrs. Latham and then get your final paper. You can not start over if you make a mistake. Engage and persist.
- Draw your name in pencil lightly. Make sure it takes up the whole page and has one point perspective. Your letters should be at least five inches tall. You must have four letters, and can add symbols to your design if you are doing a nickname or have a short name. Ie Ty.
- Create a design to frame out your name or word in the background. Remember the examples of brick wall and cool outlines we looked at.
- Outline your drawing with sharpie. You don't have to use black but you do have to use sharpies to outline your work. You can use marker, or colored pencils for this assignment.
- Color in your one point or “3d” areas first
- Choose a contrasting color and color the rest.
- When your design is finished, we are going to use scissors and glue to a piece of colored paper.
- Don't forget to tag it, take a pic, and turn it in to hang or take home. Your choice.
Welcome my most amazing artist!
|
Welcome to art. Please bookmark this page as it is where you will find everything you will need for art.
Lesson ONe/ Wax Resist Sketchbook covers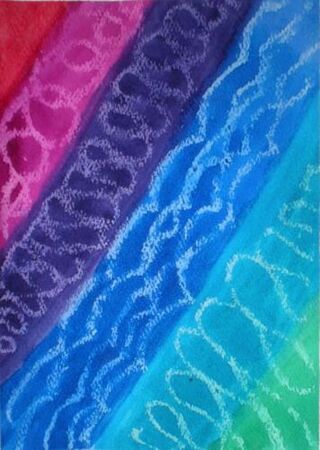
|
Lesson Introduction: Dive into art making. Create a design on your cover. The challenge is this semester is to hide your name in a design.
Lesson Objective: Create artwork using wax resist, learn classroom procedures and expectations while engaged in art making. Students begin to learn studio thinking processes on day one. Vocabulary: Wax resist, line, shapes, patterns, thumbnail, oil pastel, water color Materials needed: Paper, watercolor, oil pastel, Resources:paintingwatercolor.com/Art-Lessons/Art-Lesson-Wax-Resist.html 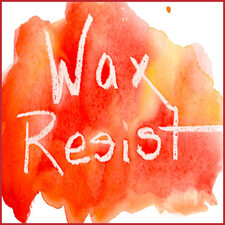
|
Time To Create
- Complete three thumbnail sketch with three different ideas for your cover.
- Show Mrs. Latham and get final paper. Using pencil, Draw your name to fill the right side of your page in. This is part of your design! MAKE it big and fill the page!
- Using a pencil, draw out your lines, and shapes to create a pattern that fills the page. Do not color or fill anything in with pencil.
- Once your drawing is completely drawn in pencil, you will trace over your lines using oil pastel.
- Fill in any area you want colored in with the oil pastel crayons.
- Watercolor over the top of your work so that all of the white is covered with color
- When it is dry, take a picture and turn it in to google classroom.
Rubric for Sketchbook cover
| your_rubric.html |
