WELCOME TO DESIGN!
I am very excited to begin this semester. This class is for high school credit. We are going to have fun creating, responding, connecting, and presenting our ideas, our processes, and our final work, while learning studio thinking processes that will help you beyond your time within the art studio. Above is a copy of the syllabus. Please read, share with your parents, and become familiar with classroom expectations. All lesson will be posted here and on google classroom. You are expected to check this page and google classroom sites as I will have video's, slide shows, and examples of projects we are working on. Please know it is your responsibility to watch these videos, and slide shows in the case of an absent so you know what to do when you get back to the studio. Please come back prepared to create. This will help you maximize your time in the studio.
Project one: Sketchbook/ Themes, concepts and designs
Time To Create
My project is successful if I have met the five studio habits listed on the objectives, in addition to the completing the options above. My work shows great time and consideration was taken in my name design. See the rubric below.
Lesson Introduction: Dive into art making. Create a design on your cover. The challenge for this semester is to create a visually compelling cover for your sketchbook.
Lesson Objective: Create sketchbook cover that uses a name as the Students begin to learn studio thinking processes on day one.
Instruction & Process:
Day one: Design Challenge: Draw your name in a type, font, style of your liking. Make it fill the page.
Day Two: Decide if you would like option one or option two and create a composition on the front and back of your cover using these ideas. Make sure your work is unified.
Day Three: Continue to draw and complete your work.
Day Four: Assemble your sketchbook and take a picture of your final work. Submit it to google classroom.
Materials needed: Paper, rulers, compass, ink pens, sharpies, colored pencils, and markers.
Rubric:
- Draw your name to fill the page in a specific font, style, design.
- Option one: create a theme and use at least 4 elements of art in your composition. Even the negative space, or white background must be a conscious choice for your concept.
- Option Two: Use one of the op art patterns from the slide show to design your cover.
My project is successful if I have met the five studio habits listed on the objectives, in addition to the completing the options above. My work shows great time and consideration was taken in my name design. See the rubric below.
Lesson Introduction: Dive into art making. Create a design on your cover. The challenge for this semester is to create a visually compelling cover for your sketchbook.
Lesson Objective: Create sketchbook cover that uses a name as the Students begin to learn studio thinking processes on day one.
Instruction & Process:
Day one: Design Challenge: Draw your name in a type, font, style of your liking. Make it fill the page.
Day Two: Decide if you would like option one or option two and create a composition on the front and back of your cover using these ideas. Make sure your work is unified.
Day Three: Continue to draw and complete your work.
Day Four: Assemble your sketchbook and take a picture of your final work. Submit it to google classroom.
Materials needed: Paper, rulers, compass, ink pens, sharpies, colored pencils, and markers.
Rubric:
Building a Digital Portfolio
What is a portfolio? A collection of your artwork
Why do we have to have one? To showcase our growth and interests as an artists. To share our work and to create a digital presence. To learn the 21st century skill of building a website.
Objectives:
- I can create a website.
- I can write an artist statement that reflects where I am as an artist.
- I can upload photos to my site in order to show my personal growth both short and long term.
- I can understand and demonstrate digital citizenship.
Steps to creating your site.
- Go to google sites.
- Click on the new google sites on the bottom right column.
- Click on the plus sign in bottom corner.
- Name your site Your First & Last Name
- Your Homepage should say… Your name and Art Portfolio
- On the right you see three tabs. Inserts, pages, themes. The insert page helps you build each page. The pages tab creates separate pages and the themes controls your font styles and size.
- Your portfolio needs to have a Home page, a page titled My Artwork, and a page titled Artist Statement. You will be expected to write a detailed artist statement. In your sketchbook you have an artist statement worksheet. Follow the prompts and you will great.
tto see my portfolio example.
Student Checklist
- The Homepage is an introduction of yourself. It must include at least one picture of yourself or of you and your family and friends. Use this page to share some of your personal interests. Think of it as an “about me” page. Tell us something about yourself? Consider including your favorite quote
- My Artwork: On this page you will upload pictures of your work. You will give your work a title, and then medium that you created it with. Example: Title: The Thinking Chair, Medium: Digital Photography
- Artist Statement: Write a detailed artist statement. Please be mindful of your grammar, and punctuation. Follow the artist statement flowchart in your sketchbook. Here is an electronic copy of that document.
file:///C:/Users/clatham/Downloads/Artist-Statement-Flow-Chart-final1.pdf
Once you are finished, publish it using your first and last name and then submit the link to google classroom under the portfolio assignment. Set the view for Topeka 501 so you may share it with future art teachers.
Discussion points:
- Their invisible audience – many students choose to set their digital portfolios to be limited to users on our school’s Google Apps domain. However, that means that everyone in our community who has an account can access student work. Eportfolios can be viewed by students, teachers, administrators, parents, and anyone with access to a username/password. This should influence students to write informatively without oversharing, and place emphasis on grammar and spelling.
- Appropriate commenting – write a comment that is specific and/or can initiate a discussion. Something like, “I liked your use of color” or “I see you painted a guitar. Do you play any other instruments?” Constructive criticism such as “ I am curious as to why you chose this specific color green, It doesn’t work for me because it doesn’t go well with the rest of your color scheme.”
- Digital citizenship and having a sound understanding of creative commons, permission, and giving credit to others for their work.
- Inserting an image by linking to the URL of the image online rather than taking a screen snapshot or dragging a copy of the image to the desktop. By using the URL, students can simply point to something else online. The alternative is to copy/take/steal a version of it which is tantamount to theft (depending on how the work is licensed).
"Digital citizenship" is an umbrella term that covers a whole host of important issues. Broadly, it's the guidelines for responsible, appropriate behavior when one is using technology. But specifically, it can cover anything from "netiquette" to cyberbullying; technology access and the digital divide; online safety and privacy; copyright, plagiarism, and digital law, and more. " for more resources check out this page.
REFERENCES:
www.educatorstechnology.com/2013/10/5-excellent-videos-to-teach-your.html
Nine Elements - Digital Citizenship
Videos
How to create an electronic portfolio.
https://youtu.be/nqbibjtgIZ8
Great Student Examples here!!!
sites.google.com/topekapublicschools.net/adisyn-caryl/artist-statement
sites.google.com/topekapublicschools.net/cjohnston/home
https://sites.google.com/topekapublicschools.net/jacobcassell2021/home
https://sites.google.com/topekapublicschools.net/kaydeevotaw/home
https://sites.google.com/topekapublicschools.net/kamm/home
https://sites.google.com/topekapublicschools.net/meganhuffman/home
Visual PLAGIARISM
Essential Question: What is visual plagiarism? What responsibilities do artist have when considering concepts, themes, and ideas for potential artwork?
Understanding these questions are important because they help clarify the ethical and legal parameters in which we create and present artwork.
Success criteria: I am successful in this lesson when I have completed the slide show and successful demonstrate how to set parameters in my search engine to ensure that I am not using copy write material.
References: Cathy Tanasse, Presentation @ NAEA Seattle Conference.
prezi.com/qr2d6qvoehwx/visual-plagiarism/
Design Concepts in zentangles
|
|
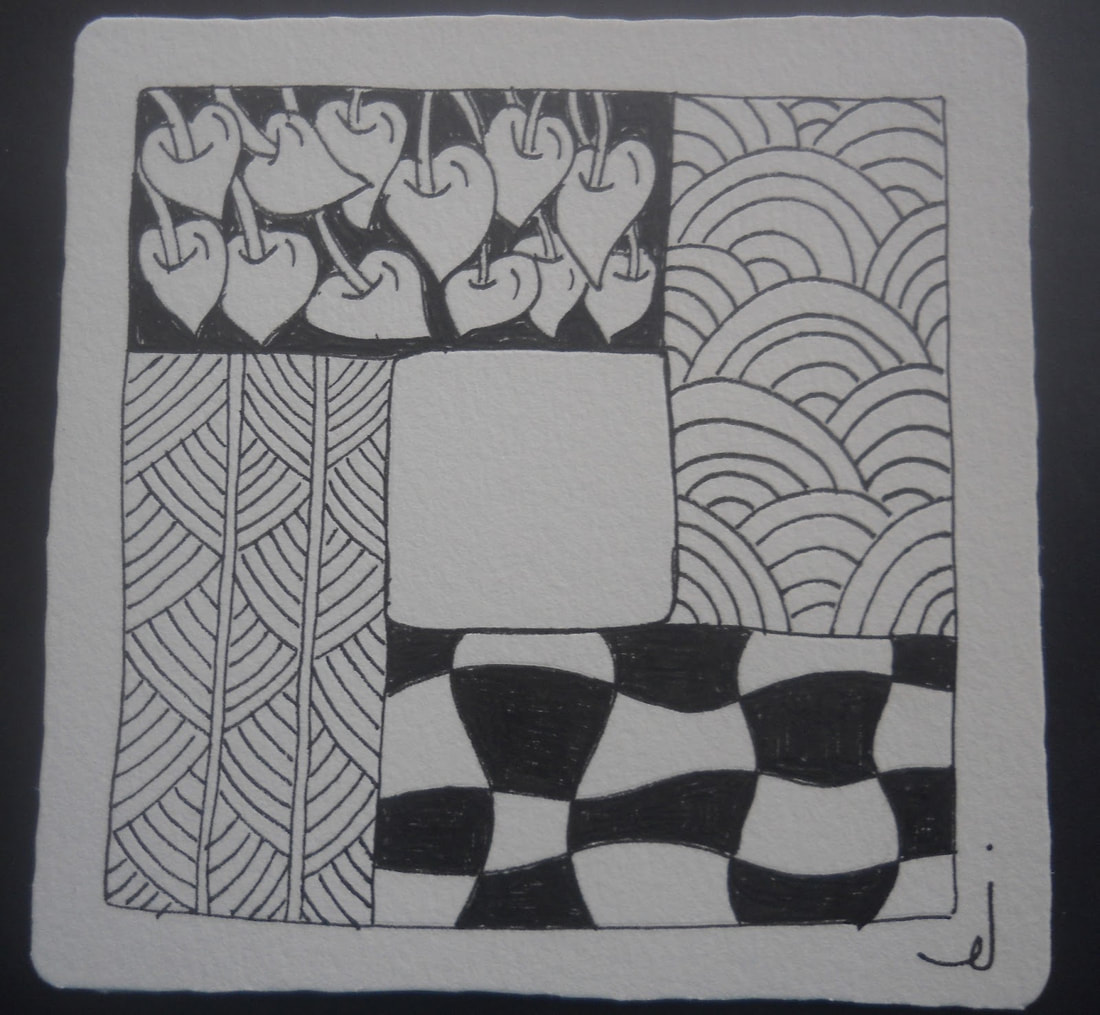
Zentangle - A ZENTANGLE is an abstract drawing created by using repetitive patterns. It is usually structured within a certain shape. Drawing a Zentangle is entertaining, relaxing, and a great way to express yourself creatively.
String - A string is generally a random line drawn in pencil which creates an area within which you draw your tangles.
Tangle - In its verb form “tangle” means to draw a tangle. You tangle a tangle, and in that process create Zentangle art. In its noun form this word is used as a replacement for “pattern.”
For more information about the Zentangle process, go to www.Zentangle.com
The Eight Steps of the Zentangle Method
01 – Gratitude and Appreciation Get comfortable, take a few deep breaths and feel gratitude and appreciation –
Step 02 – Corner Dots Place a light pencil dot in each corner, about a pen's width from the edges. Now it’s no longer a blank piece of paper.
Step 03 – Border Connect those dots with a light pencil line, straight or curvy, to create a square. This is your border.
Step 04 – String Inside the border, draw a light pencil line or lines to make what we call a "string." The string separates your tile into sections, in which you draw your tangles. A string can be any shape. It may be a curvy line that touches the edge of the border now and then, or series of straight lines that go from one side of the border to the next.
Step 05 – Tangle A tangle is a predefined sequence of simple strokes that make up a pattern. Draw your tangles in pen inside (usually) the pencil strings and borders.
Step 06 – Shade Add shades to parts to create positive and negative space.
Step 07 – Initial and Sign This is art you created. On the back, place your name, and hour.
Step 08 – Appreciate Hold your tile at arm’s length. Turn it this way and that. Appreciate what you just created.
Time To Create our zentangle
This week, we will begin our exploration of zentangles practicing 3 thumbnail sketches in our sketchbook. The zentangles must be at least 4 x 4 inches and have detailed attention to line, shapes, and patterns. After completing your three thumbnail sketches, you are going to complete a final one using fine tip sharpie and 6X6 paper. This work is going to be our first class critique and will be displayed in the hallway. I want you to think about how you can use the principles of design to help guild your creative process.
Day one : Draw Three thumbnails in your sketchbook Pick a couple of the design principles in your notes and use them in your thumb nails.
Day Two: Pick the one you like best and draw it on 6x 6 inch paper. Use pencil first then go over it with your sharpie.
Last Day: Take a picture of your final work and upload it with your picture of sketches to google classroom. Don't forget to turn it in to Mrs. Latham, as this is getting hung and will be our first formal critic.
Art Nouveau and Gustav Klimt

| art_nouveau_scratchboard_drawing__an_introduction_to_gustav_klimt.pdf |
contour line & charcoal value Drawing
Essential Question:
How does the addition of value in our work affect the final image? How can drawing from observation help us improve as artist? How can it help people in career other than art? •How does learning about art impact how we perceive the world?
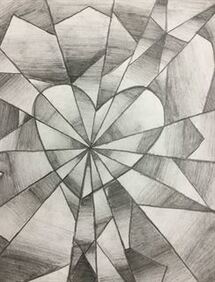
Success Criteria: My project is successful when I have drawn a contour drawing that is accurate in shape and proportion and is completely filled with small fractured value scales that smoothly transition from light to dark.
Learning Objective: I can draw a contour drawing of a bottle and apply geometric retractile lines so that each shape is a miniature value scale. I can create value scale using charcoal and chalk.
Vocabulary: Contour drawing, value scale , geometric shapes, charcoal, value range, high key, low key,
Cooperative learning strategies: quiz, quiz, trade vocabulary cards.
Instruction & Process:
Materials needed: Black paper, pencil and chalk, bottles
Grading Format: Rubric
Resources: ilaea.org/wp-content/uploads/2011/11/Shattered-Bottles-Lesson.pdf
https://www.incredibleart.org/lessons/high/Marianne-Values.htm
How does the addition of value in our work affect the final image? How can drawing from observation help us improve as artist? How can it help people in career other than art? •How does learning about art impact how we perceive the world?
Success Criteria: My project is successful when I have drawn a contour drawing that is accurate in shape and proportion and is completely filled with small fractured value scales that smoothly transition from light to dark.
Learning Objective: I can draw a contour drawing of a bottle and apply geometric retractile lines so that each shape is a miniature value scale. I can create value scale using charcoal and chalk.
Vocabulary: Contour drawing, value scale , geometric shapes, charcoal, value range, high key, low key,
Cooperative learning strategies: quiz, quiz, trade vocabulary cards.
Instruction & Process:
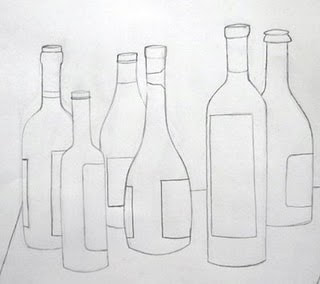
- Draw a contour drawing of a bottle to scale. Fill the page.
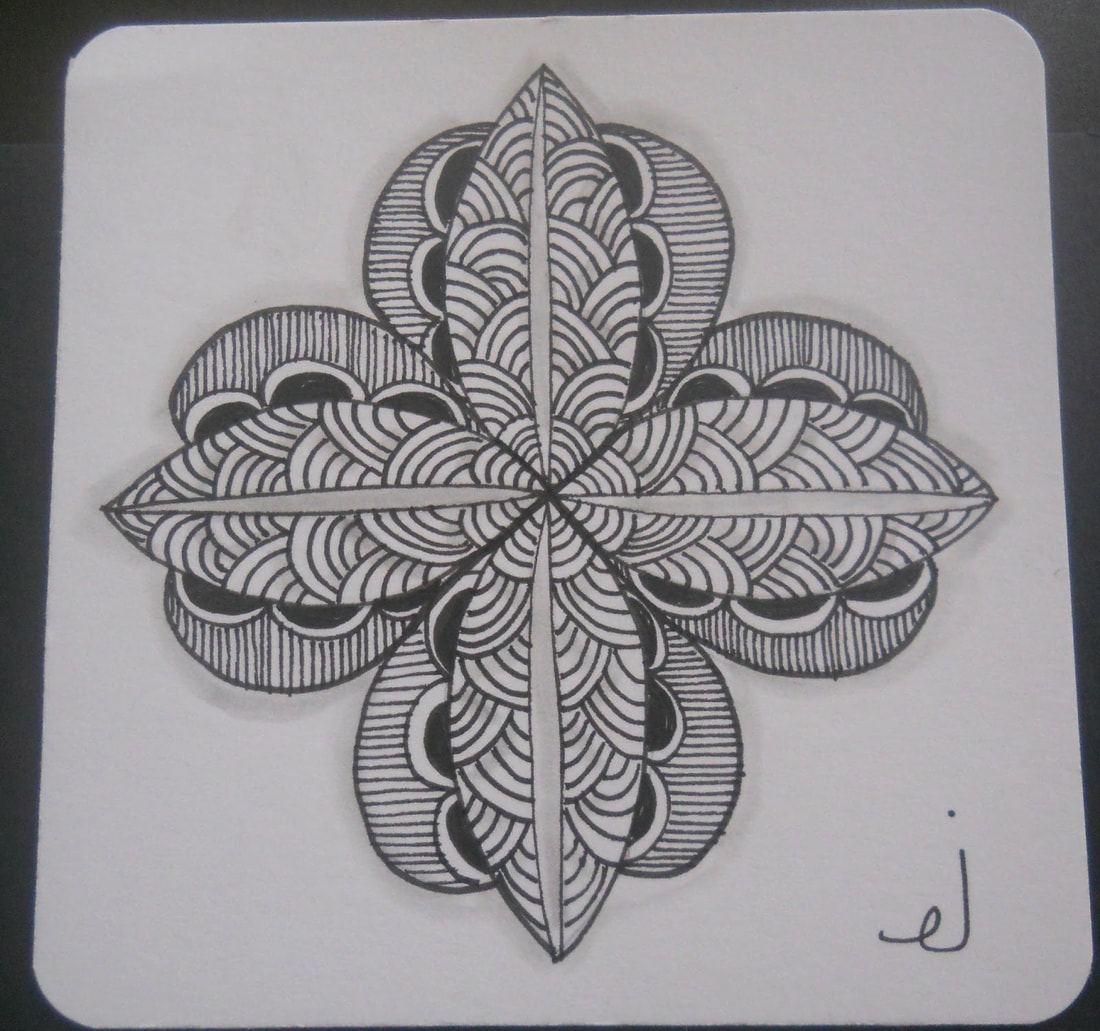
- Divide the drawing into sections using shapes and lines. Don't make your shapes too small. The lines should shatter the drawing to look like a puzzle of broken glass.
- Fill in each shape, both in the possessive and negative shape with its own mini value scale. Get creative and make sure you fill all your spaces.
- Spray hairspray over it, Take a picture and turn it in to google classroom. Upload your work to your digital portfolio.
Materials needed: Black paper, pencil and chalk, bottles
Grading Format: Rubric
Resources: ilaea.org/wp-content/uploads/2011/11/Shattered-Bottles-Lesson.pdf
https://www.incredibleart.org/lessons/high/Marianne-Values.htm
|
|
Introduction to Value and Grid Drawing.
Back by popular demand students are getting pumped for a lesson that has become quite the tradition at Jardine.
Time to Create a Grid Drawing
“If you’re overwhelmed by the size of a problem, break it down into many bite sized pieces.” Breaking the drawing into “bite sized pieces,” or small squares, helps students feel less overwhelmed.
Use these steps to create a grid drawing lesson plan:
LESSON DETAILS
Lessons: Grid drawing and self-portrait.
Essential Questions: What role does persistence play in revising, refining and developing work? How do people contribute to awareness and understanding of their lives and lives of their communities through art making?
I can draw a grid using precise measurement and straight lines.
I can identify and transfer the values I see, using a full range of values and smooth transition.
Objective: In this lesson we are going to shift to a different method of drawing. Students will be introduced to the importance of grid and how it allows us to keep our work in proportion. Students are building upon and further explore the use of value and line weight within a drawing.
Introduction: This is an introduction to a new method of drawing. We will create a self-portrait using a grid. Building on the influence of value, we are now incorporating the idea of space and texture. Once our portraits are finished we will cut them and weave them in with the photocopied version that you have been working from.
Materials: white paper, a photocopy of the students’ pictures. (These will have to be taken and printed ahead of time), drawing pencils, tracing paper, erasers, scissors, rulers, tape, glue, black paper to frame their work.
Vocabulary: Grid system, value scale,
Resources: Mrs. Folk, Lyons High School; I wanted to do a grid drawing for part of my unit and I remembered how much I loved doing this.
Examples: See below.
Demonstration /Guided Practice: This project is going to need a lot of scaffolding. Students are going to have to draw a grid ½ inch by ½ on both pieces of paper. I have value scales, on the table and a light box for students to use to help find the contour lines of their image.
Time to Create a Grid Drawing
“If you’re overwhelmed by the size of a problem, break it down into many bite sized pieces.” Breaking the drawing into “bite sized pieces,” or small squares, helps students feel less overwhelmed.
Use these steps to create a grid drawing lesson plan:
- Choose a photograph and and resize it to fit the doc so it’s 8 ½ x 11.
- Copy Photo
- Paste into a Doc
- click on photo and then grab the blue dot in the lower right corner and drag it to fit the page.
- NAME THE FILE YOUR NAME/ HR!!!!!!!!
- Submit to the classroom shared file in google classroom.
- Choose a piece of white drawing paper – 9 x 12.
- Draw a grid using ½ x ½. For an 9x12 piece of paper, students will have 18 spaces horizontally, and 24 vertically. For a 1 inch grid you will have 9 horizontally and 12 vertically.
- Draw the same grid over your photograph. It must be ½ inch by ½ inch squares, unless you have permission to do a 1 inch grid.
- From the top right corner, number your boxes from 1-24 vertically and then 1-18 across the top of your grid paper.
- Number it again the same way on your printed photo.
- Lightly drawing the contour lines of the photograph. Use the light box if you need.
- Be sure to look at each individual box as you draw.
- looking at each ½ square at a time from your photograph, draw the values and shapes of each little square you see from your photo, onto your grid.
LESSON DETAILS
Lessons: Grid drawing and self-portrait.
Essential Questions: What role does persistence play in revising, refining and developing work? How do people contribute to awareness and understanding of their lives and lives of their communities through art making?
I can draw a grid using precise measurement and straight lines.
I can identify and transfer the values I see, using a full range of values and smooth transition.
Objective: In this lesson we are going to shift to a different method of drawing. Students will be introduced to the importance of grid and how it allows us to keep our work in proportion. Students are building upon and further explore the use of value and line weight within a drawing.
Introduction: This is an introduction to a new method of drawing. We will create a self-portrait using a grid. Building on the influence of value, we are now incorporating the idea of space and texture. Once our portraits are finished we will cut them and weave them in with the photocopied version that you have been working from.
Materials: white paper, a photocopy of the students’ pictures. (These will have to be taken and printed ahead of time), drawing pencils, tracing paper, erasers, scissors, rulers, tape, glue, black paper to frame their work.
Vocabulary: Grid system, value scale,
Resources: Mrs. Folk, Lyons High School; I wanted to do a grid drawing for part of my unit and I remembered how much I loved doing this.
Examples: See below.
Demonstration /Guided Practice: This project is going to need a lot of scaffolding. Students are going to have to draw a grid ½ inch by ½ on both pieces of paper. I have value scales, on the table and a light box for students to use to help find the contour lines of their image.
Beach Ball critique
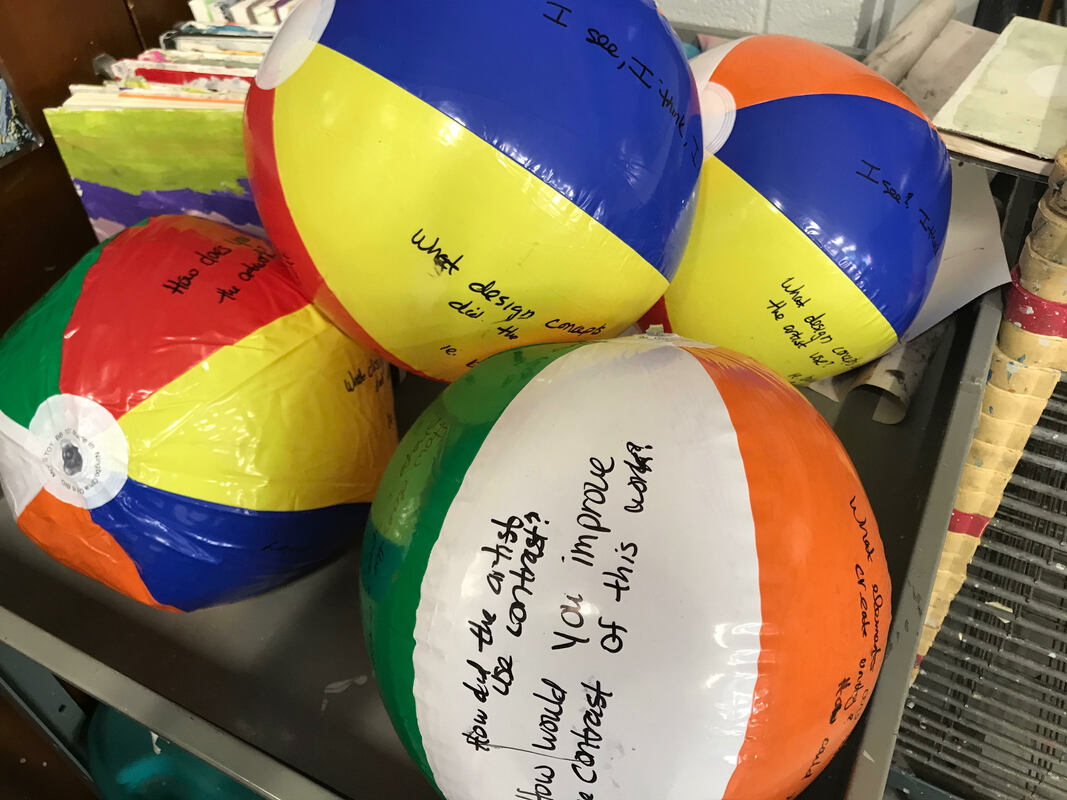
Lesson Introduction: A critique is an oral or written discussion strategy used to analyze, describe, and interpret works of art. Critiques help students hone their persuasive oral and writing, information-gathering, and justification skills.
Essential Questions:
How does collaboratively reflecting on art help us experience it more fully, and develop it more completely?
How does knowing and using visual art vocabularies help us understand and interpret works of art?
How is personal preference different from an evaluation?
Success Criteria: I am successful in my discussion when I have participated in the critique and used my art vocabulary words associated with the lesson.
Learning Objective: I can talk objectively about art by responding and connecting to the work of others?
Vocabulary: Balance, contrast, emphasis, unity, craftsmanship, design compositions. Variety
Collaborative activities: beach ball critique/ small groups.
Materials needed: beach ball and guided questions
Grading Format: observation of participation and use of vocabulary words.
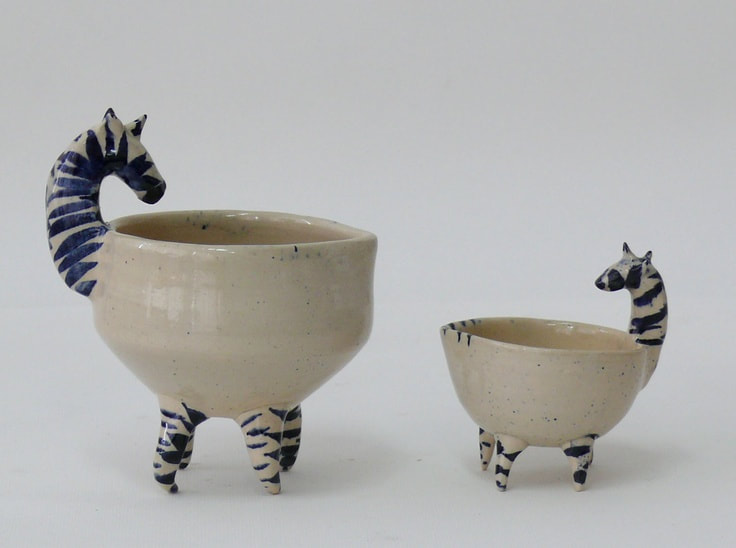
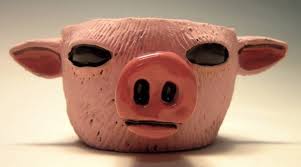
PINCH-POT Animal Bowls
|
|
Lesson Introduction: Pinch- Pot animal bowls.
The pinch pot is a great way to introduce the feel and limitations of the clay body. Students will extend their knowledge of the pinch pot into a sculptural practice as they have to turn the bowl into an animal of their choice.
Essential Questions: Why do artist follow or break from established traditions? How do artist and designers learn from trial and error? Why do people value objects, artifacts, and artwork and select them for presentation?
Success Criteria: I am successful when I have turned in a well crafted and well constructed pinch pot that has taken on the theme of an animal. My bowl is able to hold candy or other small materials.
Learning Objective: I can create ceramic work that can be both functional and decorative. I can demonstrate proper construction of clay and identify the various stages of the clay body as it dries. I can use glaze effectively and explain the importance of the kiln.
National Standards:
Anchor Standard 1: Generate and conceptualize artistic ideas and work.
Anchor Standard 2: Organize and develop artistic ideas and work.
Anchor Standard 3: Refine and complete artistic work
Anchor Standard 5: Develop and refine artistic techniques and work for presentation.
Anchor Standard 10: Synthesize and relate knowledge and personal experiences to make art. Enduring Understanding: Through art-making, people make meaning by investigating and developing awareness of perceptions, knowledge, and experiences.
Vocabulary: pinch pot, coils, slip and scoring,
Collaborative engagement: Think, pair share to come up with concepts in the planning of our work. Collaborative engagement during building and clean up as well.
Instruction & Process:
Students will be guided through concept strategies to plan for their ideas in sketchbook.
Come up with three different ideas, (either different animals or different ideas for one animal) and figure out how they would build a bowl with these ideas. Discuss ideas with teacher and show your sketches.
Students then get clay and begin making their bowl, and then learn to add details with slipping, scoring, blending, to make it an animal.
Materials needed: Stoneware clay, Clay tools, kiln, grazes and brushes.
Grading Format: rubric https://www.rcampus.com/rubricshowc.cfm?code=KXC483X&sp=yes
Resources: Art and Activities / Feb 19 issue. This lesson was written by Irv Osterer
Slide presentation from Rebecca Borg
How to Throw on the wheel
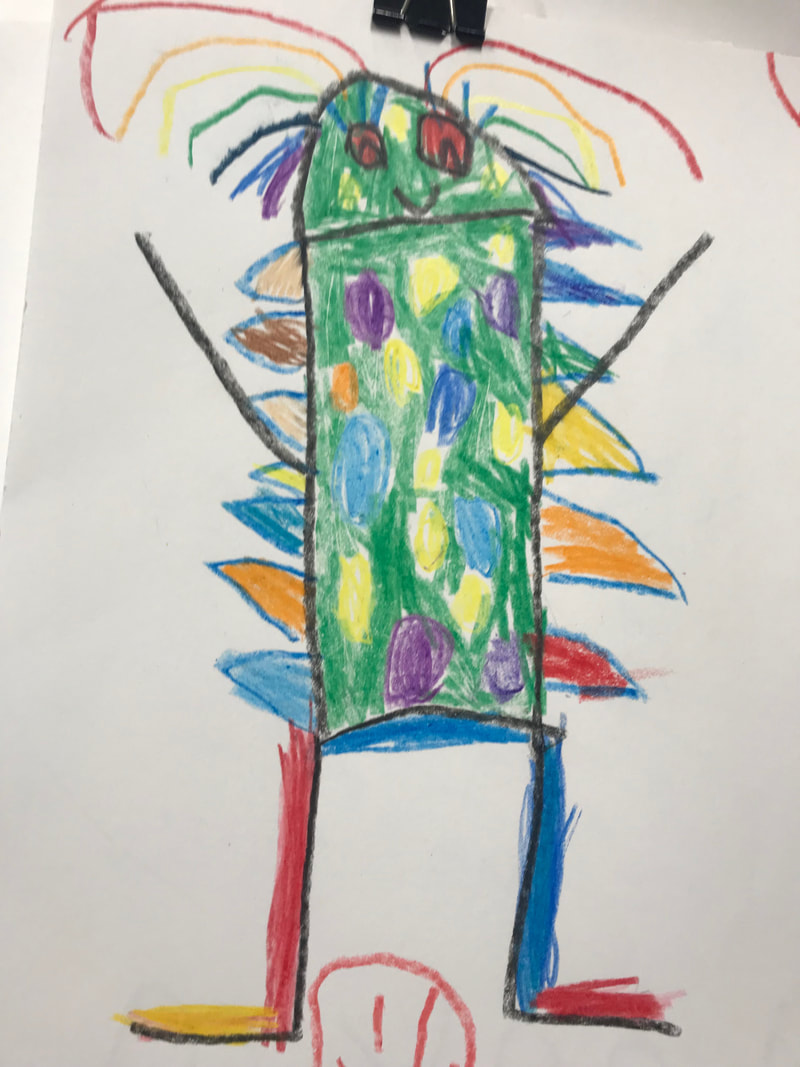
COLLABORATIVE clay monsters with k, 1 and 2.

Lesson Introduction:
We will look at some artist and art movements that are taking the creative ideas of children and turning them into art.
Essential Questions:
What factors prevent or encourage people to take creative risks?
How does collaboration expand the creative process?
How do artist and designers learn from trial and error?
Success Criteria: My Monster is successful when I have completed the task using slab and hand building techniques and have created a visual likeness to my clients drawings. My monster must be constructed using slab building techniques or adding together two pinch pots but IT CAN NOT BE A SOLID CHUNK OF CLAY!!!! My monster must be at least five inches tall, can stand on its own and be glazed to reflect the ideas of the client.
Extra Credit:
In the event that the monster is a functional ware, such as a vase, storage box, or object with a lid, extra credit will be given. 5 points
If the artist decides to give the monster to the client, extra credit will also be available. 15 points.
Learning Objective:
I can work from the ideas of 2d to 3d creating work that can stand. I can work collaboratively with my peers to complete the project.
I can use slab building and, or double pinch pot building methods to create clay monster sculptures.
I can demonstrate proper construction of clay and identify the various stages of the clay body as it dries.
I can use glaze effectively and explain the importance of the kiln.
National Standards:
Anchor Standard 1: Generate and conceptualize artistic ideas and work.
Anchor Standard 2: Organize and develop artistic ideas and work.
Anchor Standard 3: Refine and complete artistic work
Anchor Standard 5: Develop and refine artistic techniques and work for presentation.
Anchor Standard 10: Synthesize and relate knowledge and personal experiences to make art. Enduring Understanding: Through art-making, people make meaning by investigating and developing awareness of perceptions, knowledge, and experiences.
Vocabulary: Slab, slip score, double pinch pot, air bubbles, kiln, bisque ware, greenware, leather hard, blending, texture, glaze
Collaborative activities: students are recreating work drawn from elementary students. Design students are working collaboratively to help each other build and to clean up between each class.
Instruction & Process:
Time To Create:
Day One:
Look critically at your drawing.
How can you turn it into a 3d form?
Discuss your strategies with your ½ table team.
Get you clay and roll our your slabs. Let them harden up just enough to begin building them.
Day Two:
Begin slipping, and scoring the corners of your slabs to create a form.
Add the details such as limbs, horns, teeth, coils, etc.
Day Three:
Smooth out, clean up, blend, and add texture where needed.
Day four:
Take one last time to make sure it is reflective of the elementary drawing. photograph both your work and the clients drawing and turn in to google classroom.
Make sure your put your initials and class hour on the bottom before putting on the cart to go to the kiln closet!
Tiempo para crear:
Día uno:
mire críticamente su dibujo.
¿Cómo puedes convertirlo en una forma 3d?
Discute tus estrategias con tu ½ mesa de equipo.
Consigue que la arcilla y rodar nuestras tus losas. Deje que se endurezca lo suficiente para comenzar a construirlos.
Día dos:
Comience a resbalar, y marque las esquinas de las losas para crear una forma.
Agregue los detalles como libs, cuernos, dientes, bobinas, etc.
Día tres:
alise, limpie, mezcle y agregue textura donde sea necesario.
Día cuatro:
Tome una última vez para asegurarse de que refleja el dibujo elemental. fotografíe su trabajo y los clientes dibujando y entregue el aula de Google.
¡Asegúrese de poner sus iniciales y horas de clase en la parte inferior antes de poner el carrito para ir al armario del horno!
Materials needed: Clay, sculpting tools, glaze, kiln, sculpting tools, plastic.
Grading Format: Peer assessment form rubric/ Conference with Teacher.
Resources:
This lesson was created in collaboration with Bridget Lee of Jardine Elementary Topeka Ks.
James DeRosso’s Monster video https://youtu.be/8hjIhqrC_WY
James DeRosso’s website http://www.monster8all.com/
Artist Joshua Margolis https://www.awesomeinventions.com/kids-drawings-clay-sculptures/
The Monster Project https://themonsterproject.org/
The stages of clay/ Glazing our ware.

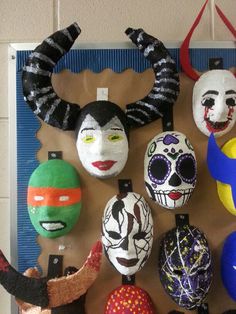
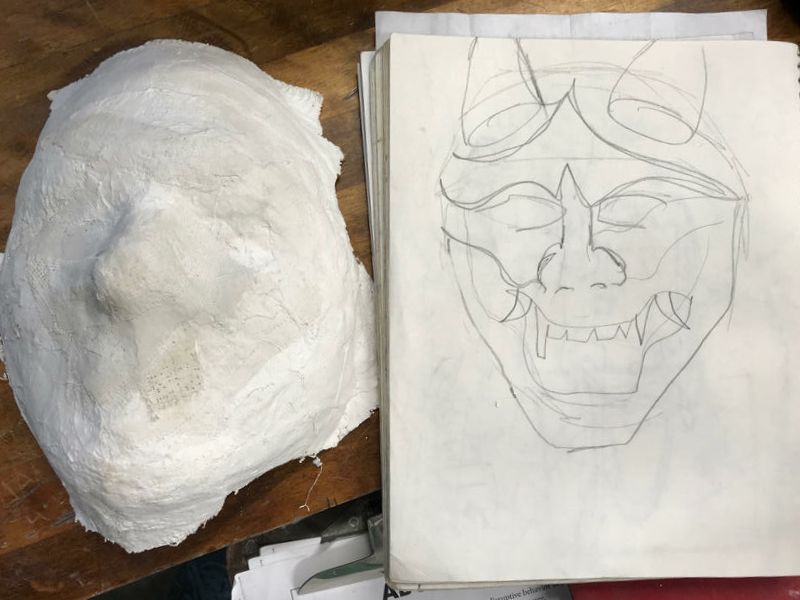
Venitian Mask
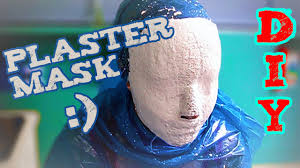
Lesson Introduction: Students will watch a video and slideshow introduction.
Essential Questions: How do images influence our view of the world? How does knowing the contexts, histories, and traditions of art forms help us create works of art and design? How does art help us understand the lives of people of different times, places, and cultures?
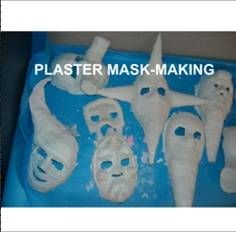
Success Criteria: I am successful when I have safely created a plaster casting and added paper mache. My mask is reflective of the Venetian carnival era and is completed with gesso, paint, and decorative items.
Learning Objective: I can create a Venetian inspired mask by way of creating a mask that is either symmetrical or asymmetrical in balance.
National Standards: Anchor Standard 1: Generate and conceptualize artistic ideas and work. Anchor Standard 10: Synthesize and relate knowledge and personal experience to make art.
Vocabulary: Form, Color Schemes, Plaster Casting, Paper Mache, Balance, Unity,
Collaborative activities: Students will cast each others faces, and work together to clean up.
Instruction & Process: We will watch a slideshow. I purchased this lesson form Klaire Lockheart so I Will not be posting the slideshare on the blog as she owns the rights to this slideshow. I will demonstrate how to do this in each class.
Materials needed: Pencil, erasers, color pencils, 2 yards of plaster per student, scissors, plastic wrap, petroleum jelly, water, newspaper, paper mache paste, gesso, brushes, acrylic paint, hot glue gun, and shiny jewels.
Grading Format: Rubric
Resources: Venetian Plaster Masks, teacherpayteachers.com/Store/Art-With Lockheart.
Time To Create:
Day 1: Introduction, research, plan, draw in sketchbook
Day 2-3: Plaster cast our faces
Day 4-6 Paper Mache our Added design
Day 7-8 Gesso
Day 9-11 Paint
Day 12-13 Hot glue found objects and jewels
Take a picture of your work and turn it in on google classroom. I would like to display some of these in the cases around school.
Tiempo para crear:
Día 1: Introducción, investigación, planificación, dibujo en cuaderno de bocetos
Día 2-3: Escayola nuestras caras
Día 4-6 Papel Mache nuestro diseño agregado
Día 7-8 Gesso
Día 9-11 Día de pintura
12-13 Pegamento caliente objetos encontrados y joyas
Tome una foto de su trabajo y entréguela en el aula de Google. Me gustaría mostrar algunos de estos en los casos alrededor de la escuela.
Essential Questions: How do images influence our view of the world? How does knowing the contexts, histories, and traditions of art forms help us create works of art and design? How does art help us understand the lives of people of different times, places, and cultures?
Success Criteria: I am successful when I have safely created a plaster casting and added paper mache. My mask is reflective of the Venetian carnival era and is completed with gesso, paint, and decorative items.
Learning Objective: I can create a Venetian inspired mask by way of creating a mask that is either symmetrical or asymmetrical in balance.
National Standards: Anchor Standard 1: Generate and conceptualize artistic ideas and work. Anchor Standard 10: Synthesize and relate knowledge and personal experience to make art.
Vocabulary: Form, Color Schemes, Plaster Casting, Paper Mache, Balance, Unity,
Collaborative activities: Students will cast each others faces, and work together to clean up.
Instruction & Process: We will watch a slideshow. I purchased this lesson form Klaire Lockheart so I Will not be posting the slideshare on the blog as she owns the rights to this slideshow. I will demonstrate how to do this in each class.
Materials needed: Pencil, erasers, color pencils, 2 yards of plaster per student, scissors, plastic wrap, petroleum jelly, water, newspaper, paper mache paste, gesso, brushes, acrylic paint, hot glue gun, and shiny jewels.
Grading Format: Rubric
Resources: Venetian Plaster Masks, teacherpayteachers.com/Store/Art-With Lockheart.
Time To Create:
Day 1: Introduction, research, plan, draw in sketchbook
Day 2-3: Plaster cast our faces
Day 4-6 Paper Mache our Added design
Day 7-8 Gesso
Day 9-11 Paint
Day 12-13 Hot glue found objects and jewels
Take a picture of your work and turn it in on google classroom. I would like to display some of these in the cases around school.
Tiempo para crear:
Día 1: Introducción, investigación, planificación, dibujo en cuaderno de bocetos
Día 2-3: Escayola nuestras caras
Día 4-6 Papel Mache nuestro diseño agregado
Día 7-8 Gesso
Día 9-11 Día de pintura
12-13 Pegamento caliente objetos encontrados y joyas
Tome una foto de su trabajo y entréguela en el aula de Google. Me gustaría mostrar algunos de estos en los casos alrededor de la escuela.
INtroduction to color theory/ the wheel/ Tints & Shades
SIMPLE COLOR WHEEL
Color is a very diverse and useful element. Color can convey emotion, create interest, or enhance a work of art. Learning how to effectively mix color takes a lot of patience, but can also be a lot of fun. For this color wheel you will be creating a composition that will reflect your understanding of the color wheel, tints and tones of a particular color, complementary, split complementary, triadic, and analogous color schemes.
VOCABULARY
Primary Color: Blue, Red, Yellow
Secondary Color: Violet, Orange, Yellow,
Intermediate Color: red-violet, red-orange, blue-violet, blue-green, yellow-green, yellow-orange (Note: intermediate colors are also called tertiary colors.)
Neutral Colors: Neutral colors don't show up on the color wheel. Neutral colors include black, white, gray, and sometimes brown and beige. They are sometimes called “earth tones.”
Tint: any hue that has various amounts of white added to it.
Shade: any hue that has various amounts of black added to it.
Complementary Colors: Two colors that are opposites on the color wheel
Split Complementary: Three color, color scheme. A hue is paired with with the two colors on each side of its complement.
Triadic: A three color, color scheme of hues that are equal distance apart on the color wheel and have three colors between them.
Analogous: Color scheme that uses colors that are next to each other on the color wheel.
TIME TO CREATE
With in your composition you will need to incorporate
Day one and Two
Mix the two colors and get green. Paint the third shape green. Add a little bit of green to the yellow and paint the second shape yellow green, then add blue to the green to make blue green. This goes in the fourth shape. Wash out your palette and brush, put work on the drying rack. If you did not finish, put wrap over your palette and put in your bin.
Paint Day Two
You should have 1/3rd of your color wheel finished. Today you get blue paint and red paint. The blue should already be painted in your color wheel Paint red in the 9th section. Then mix the red and the blue to make violet or purple. Paint the 7th section purple/ violet. It should be directly across from the yellow. Mix the red and violet to make red violet, paint in section number eight and then mix the blue and violet to make blue violet. This goes next to the blue in section six. Wash out your palette and brush, put work on the drying rack. If you did not finish, put wrap over your palette and put in your bin.
Paint Day Three
Now 2/3rds of your wheel is finished. The yellow should already be painted. Today you need yellow and red paint to finish your wheel. Mix and red to make orange, and paint the 10 section of your circle. Next, mix orange into the yellow to make yellow orange.Paint the 11th section. It goes next to the yellow. Lastly, slowly add red paint to orange until you have made red orange and paint. Wash out your palette and brush, put work on the drying rack.Make sure your name and class hour is on it.
Paint Day four
At the bottom in the value scale you are going to choose one color and add white and black to it creating a monochromatic value scale. It should be painted so the 3 lightest colors are on the left. The pure color in the middle in section four. Then the last three are the shades. Your value scale should be in order from light to darkest color.
CONGRATS, YOU'RE FINISHED!!!
RUBRIC
Was there 12 different hues mixed and placed acuity with yellow on top? 20
How was your overall craftsmanship? does it show great time and consideration was taken? 10
Did your composition include tints and shades of 1 color? 10
Did you participated in cleaning your brushes and clean up? 10
Did you practice safety and use materials responsibly? 10
Essential questions:
How do artist and designers care for and maintain materials,tools and equipment? What role does craftsmanship play in a color study?
How does understanding color theory help me grow as an artist?
Success Criteria:
I am successful when I have completed a color wheel and tints and shades of one color. I have washed my palette and turned my work into google classroom.
Color is a very diverse and useful element. Color can convey emotion, create interest, or enhance a work of art. Learning how to effectively mix color takes a lot of patience, but can also be a lot of fun. For this color wheel you will be creating a composition that will reflect your understanding of the color wheel, tints and tones of a particular color, complementary, split complementary, triadic, and analogous color schemes.
VOCABULARY
Primary Color: Blue, Red, Yellow
Secondary Color: Violet, Orange, Yellow,
Intermediate Color: red-violet, red-orange, blue-violet, blue-green, yellow-green, yellow-orange (Note: intermediate colors are also called tertiary colors.)
Neutral Colors: Neutral colors don't show up on the color wheel. Neutral colors include black, white, gray, and sometimes brown and beige. They are sometimes called “earth tones.”
Tint: any hue that has various amounts of white added to it.
Shade: any hue that has various amounts of black added to it.
Complementary Colors: Two colors that are opposites on the color wheel
Split Complementary: Three color, color scheme. A hue is paired with with the two colors on each side of its complement.
Triadic: A three color, color scheme of hues that are equal distance apart on the color wheel and have three colors between them.
Analogous: Color scheme that uses colors that are next to each other on the color wheel.
TIME TO CREATE
With in your composition you will need to incorporate
Day one and Two
- Using your ruler, compass and protractor, draw a giant circle and divide it evenly into 1/12th. Using your protractor, it should measure every 30 degrees.
- At the bottom of your paper, use a ruler to make a value scale. It should have 7 sections, each being 1 inch long.
- Once you have completed your drawing, you will use acrylic paint to add the primary, secondary, and intermediate colors.
- The top your your circle will be yellow. You will paint clockwise.
- Paint Day One:
Mix the two colors and get green. Paint the third shape green. Add a little bit of green to the yellow and paint the second shape yellow green, then add blue to the green to make blue green. This goes in the fourth shape. Wash out your palette and brush, put work on the drying rack. If you did not finish, put wrap over your palette and put in your bin.
Paint Day Two
You should have 1/3rd of your color wheel finished. Today you get blue paint and red paint. The blue should already be painted in your color wheel Paint red in the 9th section. Then mix the red and the blue to make violet or purple. Paint the 7th section purple/ violet. It should be directly across from the yellow. Mix the red and violet to make red violet, paint in section number eight and then mix the blue and violet to make blue violet. This goes next to the blue in section six. Wash out your palette and brush, put work on the drying rack. If you did not finish, put wrap over your palette and put in your bin.
Paint Day Three
Now 2/3rds of your wheel is finished. The yellow should already be painted. Today you need yellow and red paint to finish your wheel. Mix and red to make orange, and paint the 10 section of your circle. Next, mix orange into the yellow to make yellow orange.Paint the 11th section. It goes next to the yellow. Lastly, slowly add red paint to orange until you have made red orange and paint. Wash out your palette and brush, put work on the drying rack.Make sure your name and class hour is on it.
Paint Day four
At the bottom in the value scale you are going to choose one color and add white and black to it creating a monochromatic value scale. It should be painted so the 3 lightest colors are on the left. The pure color in the middle in section four. Then the last three are the shades. Your value scale should be in order from light to darkest color.
CONGRATS, YOU'RE FINISHED!!!
RUBRIC
Was there 12 different hues mixed and placed acuity with yellow on top? 20
How was your overall craftsmanship? does it show great time and consideration was taken? 10
Did your composition include tints and shades of 1 color? 10
Did you participated in cleaning your brushes and clean up? 10
Did you practice safety and use materials responsibly? 10
Essential questions:
How do artist and designers care for and maintain materials,tools and equipment? What role does craftsmanship play in a color study?
How does understanding color theory help me grow as an artist?
Success Criteria:
I am successful when I have completed a color wheel and tints and shades of one color. I have washed my palette and turned my work into google classroom.
